crwdns2933423:0crwdne2933423:0

Remplacement du moteur sur Ridgid R86034

crwdns2935425:01crwdne2935425:0

crwdns2936315:0crwdne2936315:0
crwdns2936317:0crwdne2936317:0
crwdns2931653:01crwdne2931653:0
Ridgid R86034 Motor Replacement: crwdns2935265:00crwdnd2935265:01crwdnd2935265:02crwdne2935265:0 Ridgid R86034 Motor Replacement: crwdns2935265:00crwdnd2935265:02crwdnd2935265:02crwdne2935265:0
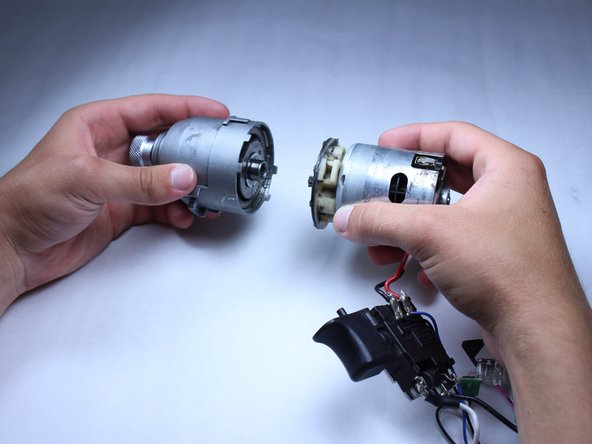
  • Do not invert gear assembly! Keep gear assembly oriented so that the chuck is lower and the place the motor was attached is higher or else gears could fall out.

  • Twist off and separate the gear assembly from the motor assembly.

  • Some force will be required to twist off the gear assembly.

  • When putting the motor back onto the gear assembly, make sure that the tabs on the edge of the gear assembly are oriented to fit the tabs found on the edges of the motor.

N'inversez pas l'assemblage des engrenages ! Gardez l'engrenage orienté de manière à ce que le mandrin soit plus bas et l'endroit où le moteur a été fixé plus haut, sinon les engrenages pourraient tomber.

Dévissez et séparez l'ensemble engrenage de l'ensemble moteur.

Une certaine force sera nécessaire pour dévisser l'ensemble de l'engrenage.

Lorsque vous remettez le moteur sur l'engrenage, assurez-vous que les languettes sur le bord de l'engrenage sont orientées pour s'adapter aux languettes se trouvant sur les bords du moteur.

crwdns2944171:0crwdnd2944171:0crwdnd2944171:0crwdnd2944171:0crwdne2944171:0