crwdns2935425:05crwdne2935425:0
crwdns2931653:05crwdne2931653:0


-
Use a plastic opening tool to pry off the plastic case surrounding the LCD screen.
-
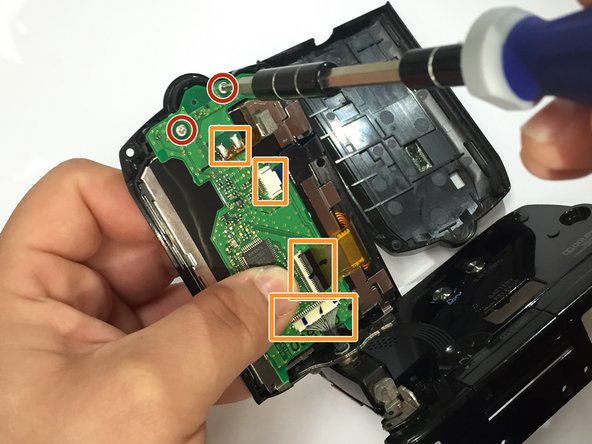
Use a Phillips #00 screwdriver to remove the two 2.5 mm screws from the motherboard on the back of the LCD screen.
-
Disconnect the cables from the motherboard. One of the connectors is soldered. For more details on desoldering connectors, take a look at this guide.
-
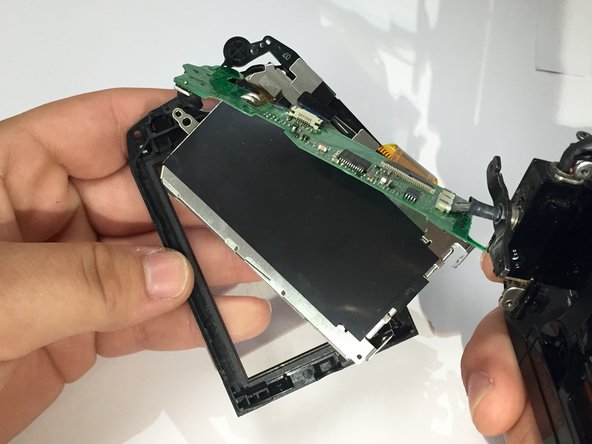
Gently pull off the motherboard from the LCD screen.
| - | [* black] Using a plastic opening tool, pry off the plastic case surrounding the LCD screen. |
|---|---|
| - | [* red] Remove the two 1x2.5 mm screws from the motherboard on the back of the LCD screen. |
| + | [* black] Use a plastic opening tool to pry off the plastic case surrounding the LCD screen. |
| + | [* red] Use a Phillips #00 screwdriver to remove the two 2.5 mm screws from the motherboard on the back of the LCD screen. |
| + | [* orange] [guide|25629|Disconnect the cables|new_window=true] from the motherboard. One of the connectors is soldered. For more details on desoldering connectors, take a look at [guide|750|this guide|new_window=true]. |
| [* black] Gently pull off the motherboard from the LCD screen. | |
| - | [* icon_caution] Be aware of the orange tab when seperating the motherboard from the LCD screen. |
crwdns2944171:0crwdnd2944171:0crwdnd2944171:0crwdnd2944171:0crwdne2944171:0