crwdns2935425:06crwdne2935425:0
crwdns2931653:06crwdne2931653:0


-
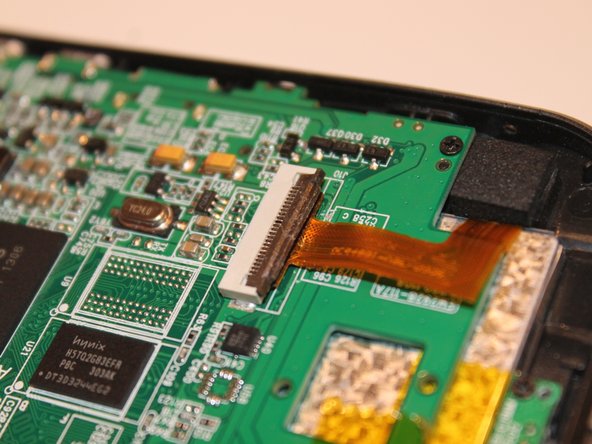
Slide the ribbon cable straight into the ZIF connector.
-
Press the locking flap down to secure the cable in place.
-
Place the camera into its socket.
| - | [* black] To install a new camera, slide the ribbon cable back into its connector |
|---|---|
| - | [* black] Reinstall the ribbon cable securing tab |
| - | [* icon_note] Note the indentation that goes along the edge of the securing tab. It must be facing up to orient the tab correctly |
| - | [* black] Install the camera in its retaining socket |
| + | [* black] Slide the ribbon cable straight into the ZIF connector. |
| + | [* icon_note] Make sure the contacts are facing the correct direction and the cable is fully inserted. |
| + | [* red] Press the locking flap down to secure the cable in place. |
| + | [* icon_reminder] The indentation on the securing tab should face up when reinstalled. |
| + | [* black] Place the camera into its socket. |
crwdns2944171:0crwdnd2944171:0crwdnd2944171:0crwdnd2944171:0crwdne2944171:0