crwdns2933423:0crwdne2933423:0

Reparación de botones no funcionales en LeapFrog Hug & Learn Baby Tad

crwdns2936315:0crwdne2936315:0
crwdns2936331:0crwdne2936331:0
crwdns2931653:09crwdne2931653:0
Repairing Non-Functional Buttons on LeapFrog Hug & Learn Baby Tad: crwdns2935265:00crwdnd2935265:01crwdnd2935265:03crwdne2935265:0 Repairing Non-Functional Buttons on LeapFrog Hug & Learn Baby Tad: crwdns2935265:00crwdnd2935265:02crwdnd2935265:03crwdne2935265:0 Repairing Non-Functional Buttons on LeapFrog Hug & Learn Baby Tad: crwdns2935265:00crwdnd2935265:03crwdnd2935265:03crwdne2935265:0
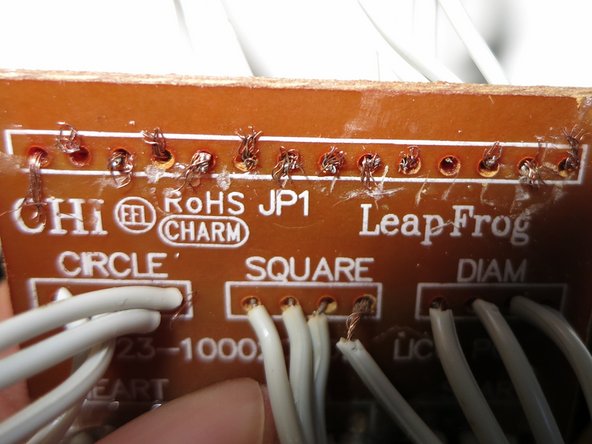
  • After you have soldered all the groups of wires, cut the excess wires on the other side of the board.

  • To prevent the wires from touching, use your needle to bend the wires in an up-and-down pattern throughout the board. Cover any exposed wires with electrical tape.

  • Once you have cut the excess wires, replace the button compartment inside the cloth bag.

  • The star, triangle, and heart should be oriented towards the head, with the blue side of the circuit board facing up.

Después de haber soldado todos los grupos de cables, corta los cables sobrantes en el otro lado del tablero.

Para evitar que los cables se toquen, usa la aguja para doblar los cables en un patrón de arriba a abajo por todo el tablero. Cubre los cables expuestos con cinta aislante.

Una vez que hayas cortado el exceso de cables, vuelve a colocar el compartimento del botón dentro de la bolsa de tela.

La estrella, el triángulo y el corazón deben estar orientados hacia la cabeza, con el lado azul de la placa de circuito hacia arriba.

crwdns2944171:0crwdnd2944171:0crwdnd2944171:0crwdnd2944171:0crwdne2944171:0