crwdns2933423:0crwdne2933423:0

Nintendo 3DS XLの分解 2015年版

crwdns2936315:0crwdne2936315:0
crwdns2936323:0crwdne2936323:0
crwdns2931653:011crwdne2931653:0
New Nintendo 3DS XL 2015 Teardown: crwdns2935265:00crwdnd2935265:01crwdnd2935265:03crwdne2935265:0 New Nintendo 3DS XL 2015 Teardown: crwdns2935265:00crwdnd2935265:02crwdnd2935265:03crwdne2935265:0 New Nintendo 3DS XL 2015 Teardown: crwdns2935265:00crwdnd2935265:03crwdnd2935265:03crwdne2935265:0
  • Once we got inside, our trusty Phillips drivers started to mysteriously let us down—these screws seemed to be in between two sizes.

  • Surprise, they're JIS! Now, where do we get ahold of a JIS bit...

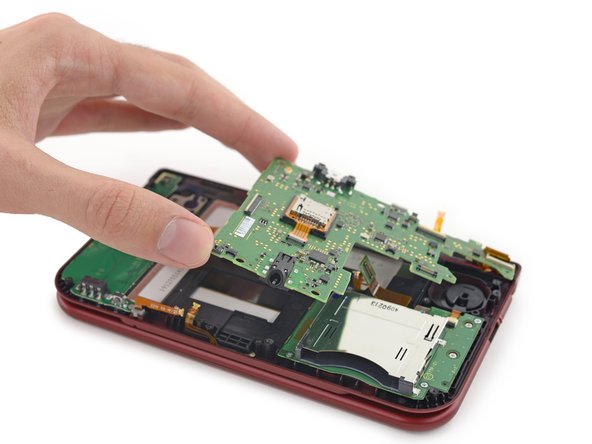
  • With our driver properly equipped, the motherboard comes flying out without delay...

  • ...or not? There's not one, but two cables attached to the rear of the motherboard, just to make things tricky.

  • Boy, reassembly's gonna be fun.

一度内部に入ると、いつも期待に応えてくれるプラスネジドライバーのはずが、なぜか私たちを失望させ始めました。 ここに留められたネジが2つのサイズのちょうど中間のようです。

サプライズ、これはJIS規格のネジです! さて、私たちはどこでJIS規格のビットを準備できるでしょうか…

ドライバーを正しく装備できれば、マザーボードは計画通り取り出せます...

...のはずですが?マザーボードの背面になんと2本のケーブルが接続されています。そのため作業には少し手こずります。

まったく、これで再組み立ては楽しいものになるはずです。しょうがないです。

crwdns2944171:0crwdnd2944171:0crwdnd2944171:0crwdnd2944171:0crwdne2944171:0