crwdns2933423:0crwdne2933423:0

Kindle Fire HD 6 マザーボードの交換

crwdns2931527:0crwdnd2931527:0crwdnd2931527:0crwdnd2931527:0crwdne2931527:0

crwdns2935425:01crwdne2935425:0

crwdns2936315:0crwdne2936315:0
crwdns2936323:0crwdne2936323:0
crwdns2931653:01crwdne2931653:0
Kindle Fire HD 6 Motherboard Replacement: crwdns2935265:00crwdnd2935265:01crwdnd2935265:02crwdne2935265:0 Kindle Fire HD 6 Motherboard Replacement: crwdns2935265:00crwdnd2935265:02crwdnd2935265:02crwdne2935265:0
  • Zero insertion force connectors can break easily. Before performing this step, read the iFixit Guide to Recognizing and Disconnecting Cable Connectors to find out how to safely remove them.

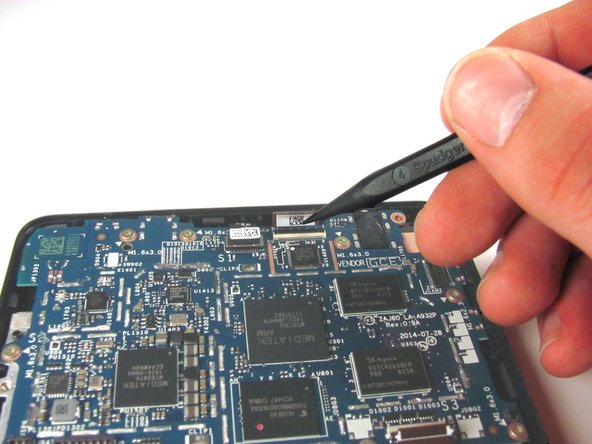
  • Use the tip of the spudger to disconnect the two zero insertion force connectors on the bottom and top of the motherboard.

  • The first connector is attached to an orange tape, and is located in the bottom-right corner of the motherboard. Remove this connector.

  • The second connector is long and thin, and is located at the top of the motherboard, a bit to the right of center. Remove this connector.

ゼロ挿入力コネクタは、簡単に破損する可能性があります。 この作業を始める前に、ケーブルコネクタの認識と切断に関するiFixitガイドを読んで、ケーブルコネクタを安全に取り外す方法を確認してください。

スパッジャーの先端を使って、マザーボード上部と下部にある2本のゼロ挿入力コネクタの接続を外します。

最初のコネクタはオレンジのテープに装着されており、マザーボードの右下にあります。このコネクタを取り出します。

2番目のコネクタは長くて薄い形状です。マザーボード上部の中央からわずかに右寄りにあります。このコネクタを取り出します。

crwdns2944171:0crwdnd2944171:0crwdnd2944171:0crwdnd2944171:0crwdne2944171:0