crwdns2935425:04crwdne2935425:0


-
Your going to want to disconnect the power cable first, which is in the middle of the device, the little black connector shown in the middle of the first photo with the red blue and black cables coming out of it.
-
your going to want to get the Plastic Spudger and use the pointed end, slowly slide it under the cables and lift carefully, do the same on the other side until the connector pops off the socket.
-
Unplugging the battery will prevent any short circuiting, we are using a Anti-Static Mat in this repair so we don't really need to worry, but disconnect it anyway to be on the safe side.
-
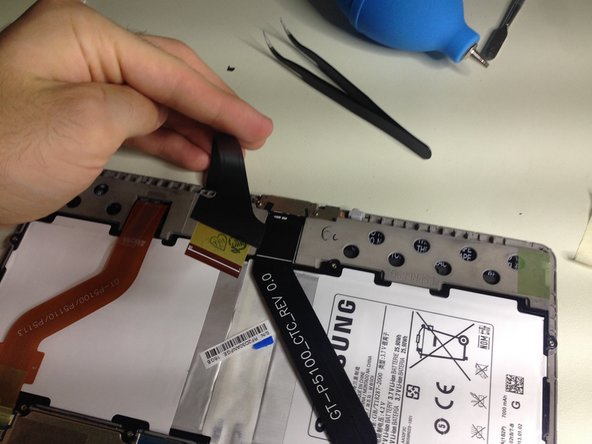
There will be two of those green sticker covers on the connectors for the touchscreen etc, remove those using the precision tweezers "They are very sticky, do not apply heat", put them somewhere safe as they need to be re-applied.
-
Proceed with disconnecting the middle ribbon cable and do so with care, flick up the latch on the back of the socket to release the cable and be sure not to bend of flex the cable as this will damage it.
| [title] Disconnecting the Touchscreen | |
| [* red] Your going to want to disconnect the power cable first, which is in the middle of the device, the little black connector shown in the middle of the first photo with the red blue and black cables coming out of it. | |
| [* black] your going to want to get the Plastic Spudger and use the pointed end, slowly slide it under the cables and lift carefully, do the same on the other side until the connector pops off the socket. | |
| [* icon_caution] *** BE CAREFUL NOT TO DAMAGE THE SOCKET OR CONNECTOR. TAKE CARE WHEN UNPLUGGING***. | |
| [* black] Unplugging the battery will prevent any short circuiting, we are using a Anti-Static Mat in this repair so we don't really need to worry, but disconnect it anyway to be on the safe side. | |
| - | [* black] There will be two of those green sticker covers on the connectors for the touchscreen etc, remove those using the precision tweezers "They are very sticky, do not apply heat", put them somewhere safe as they need to be re-applied. |
| + | [* black] There will be two of those green sticker covers on the connectors for the touchscreen etc, remove those using the precision [product|IF145-020|tweezers] "They are very sticky, do not apply heat", put them somewhere safe as they need to be re-applied. |
| [* black] Proceed with disconnecting the middle ribbon cable and do so with care, flick up the latch on the back of the socket to release the cable and be sure not to bend of flex the cable as this will damage it. |
crwdns2944171:0crwdnd2944171:0crwdnd2944171:0crwdnd2944171:0crwdne2944171:0