crwdns2935425:04crwdne2935425:0
crwdns2931653:04crwdne2931653:0

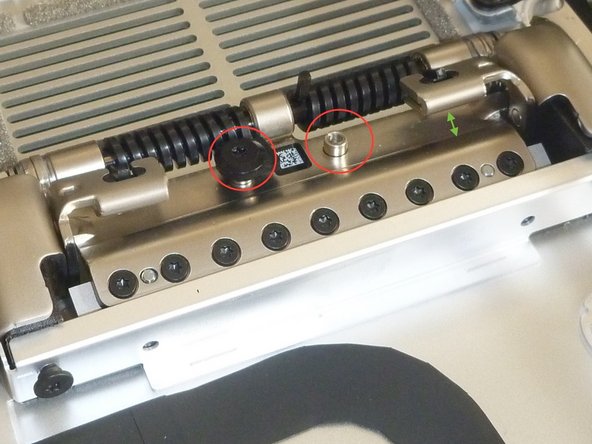


Release spring tension in the stand if necessary
-
The screws circled in red maintain the pressure on the coil springs in the stand. If you can maneuver the iMac relative to the stand such that the gap highlighted by the green arrow (pic2) closes all the way, then pressure from the coil springs will be removed from the external part of the stand.
-
I couldn't do that, so I removed these screws to release the pressure between the internal and external part of the stand.
-
NOTE: once the screw is released, the coil spring will launch the plastic piece and screw that hold the spring! (It took me quite a while to find the first one.) I highly recommend covering the screw with something (pic3) as you remove the screw.
crwdns2944171:0crwdnd2944171:0crwdnd2944171:0crwdnd2944171:0crwdne2944171:0