crwdns2935425:04crwdne2935425:0
crwdns2931653:04crwdne2931653:0

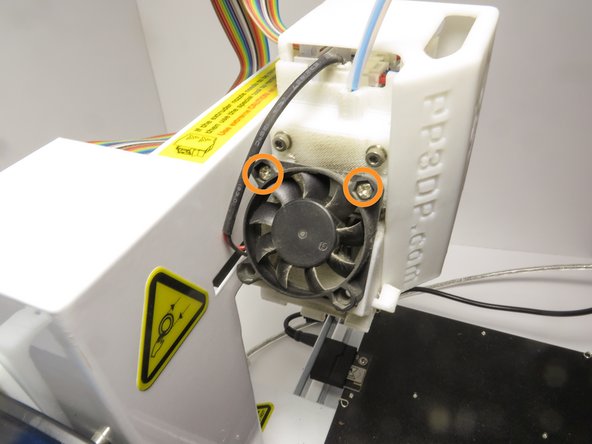


Insert replacement fan
-
Place the replacement fan on the extruder assembly in the right orientation.
-
Connect the cable make sure that it has a solid connection.
-
Secure the fan by screwing the top screws back into place in a clockwise rotation.
crwdns2944171:0crwdnd2944171:0crwdnd2944171:0crwdnd2944171:0crwdne2944171:0