crwdns2933423:0crwdne2933423:0

Démontage de base du Nokia Lumia 822

crwdns2936315:0crwdne2936315:0
crwdns2936317:0crwdne2936317:0
crwdns2931653:08crwdne2931653:0
Nokia Lumia 822 Basic Disassembly: crwdns2935265:00crwdnd2935265:01crwdnd2935265:03crwdne2935265:0 Nokia Lumia 822 Basic Disassembly: crwdns2935265:00crwdnd2935265:02crwdnd2935265:03crwdne2935265:0 Nokia Lumia 822 Basic Disassembly: crwdns2935265:00crwdnd2935265:03crwdnd2935265:03crwdne2935265:0
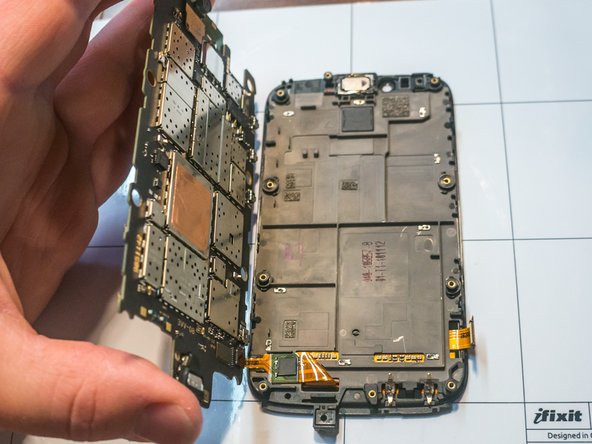
  • Raise the logic board by the edge freed in the previous step, and slide it from underneath the remaining clips on the other side.

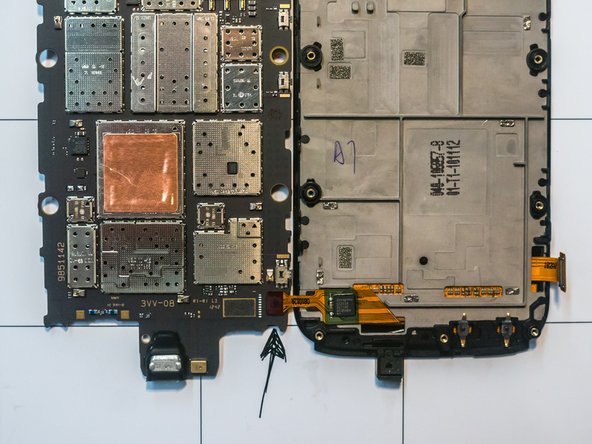
  • There is a second ribbon cable directly across from the first, on the underside of the logic board, visible in the last two photos.

  • Carefully flip the logic board and set it on the workspace next to the screen assembly. Take care to avoid damaging the ribbon cable.

Soulevez la carte mère par le bord libéré à l'étape précédente et faites-la glisser sous les clips restants de l'autre côté.

Il y a un deuxième câble ruban juste en face du premier, sous la carte mère, visible sur les deux dernières photos.

Retournez délicatement la carte mère et placez-la sur l'espace de travail à côté de l'écran. Veillez à ne pas endommager le câble ruban.

crwdns2944171:0crwdnd2944171:0crwdnd2944171:0crwdnd2944171:0crwdne2944171:0