crwdns2933423:0crwdne2933423:0

Replacing Panasonic SA-HT810V New Screen, Motherboard, and Power Supply

crwdns2936315:0crwdne2936315:0
crwdns2936321:0crwdne2936321:0
crwdns2931653:07crwdne2931653:0
Replacing Panasonic SA-HT810V New Screen, Motherboard, and Power Supply: crwdns2935265:00crwdnd2935265:01crwdnd2935265:02crwdne2935265:0 Replacing Panasonic SA-HT810V New Screen, Motherboard, and Power Supply: crwdns2935265:00crwdnd2935265:02crwdnd2935265:02crwdne2935265:0
  • Locate and remove the six screws that are circled in image one.

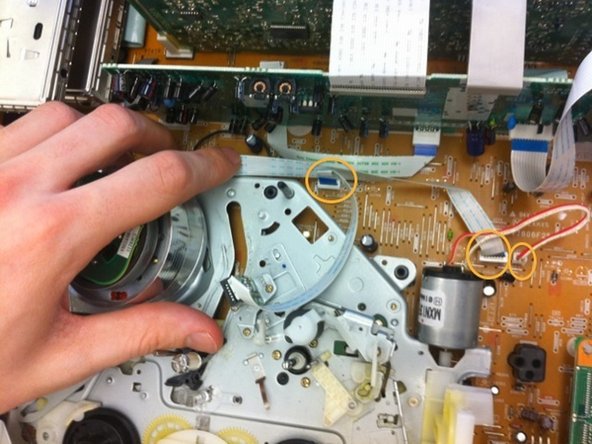
  • Remove the two electronic strips that are circled in image two that connect the VCR to the motherboard and unplug the cable.

  • Slowly remove the VCR by lifting it up and set aside. It may be difficult to slide the VCR from the black pegs that keep it in place.

crwdns2935429:0crwdne2935429:0

crwdns2935429:0crwdne2935429:0

crwdns2935429:0crwdne2935429:0

crwdns2944171:0crwdnd2944171:0crwdnd2944171:0crwdnd2944171:0crwdne2944171:0