crwdns2933423:0crwdne2933423:0

Dynex DX‑PDVD9 Optical Drive Replacement

crwdns2936315:0crwdne2936315:0
crwdns2936321:0crwdne2936321:0
crwdns2931653:08crwdne2931653:0
Dynex DX‑PDVD9 Optical Drive Replacement: crwdns2935265:00crwdnd2935265:01crwdnd2935265:03crwdne2935265:0 Dynex DX‑PDVD9 Optical Drive Replacement: crwdns2935265:00crwdnd2935265:02crwdnd2935265:03crwdne2935265:0 Dynex DX‑PDVD9 Optical Drive Replacement: crwdns2935265:00crwdnd2935265:03crwdnd2935265:03crwdne2935265:0
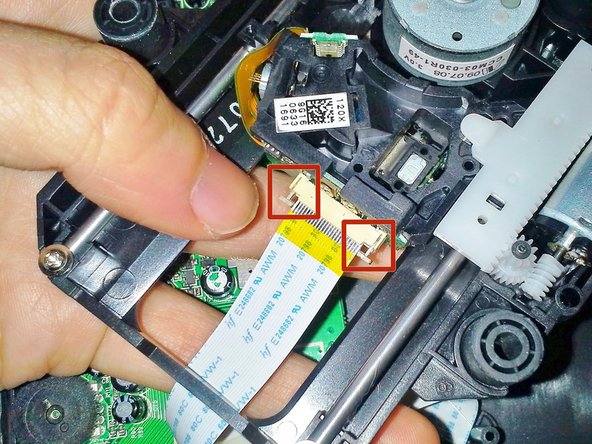
  • Now that the optical drive is removed from the case, flip it over and locate the ribbon cable.

  • Gently pull out the two sides of the brown tab underneath the ribbon cable, see images for detail.

  • Once both sides of the tab are out, it should require no force to pull the ribbon cable out of the connection on the optical drive.

crwdns2935429:0crwdne2935429:0

crwdns2935429:0crwdne2935429:0

crwdns2935429:0crwdne2935429:0

crwdns2944171:0crwdnd2944171:0crwdnd2944171:0crwdnd2944171:0crwdne2944171:0