crwdns2933423:0crwdne2933423:0

Sony Vaio VGN-FS640 LCD Screen Replacement

crwdns2936315:0crwdne2936315:0
crwdns2936319:0crwdne2936319:0
crwdns2931653:010crwdne2931653:0
Sony Vaio VGN-FS640 LCD Screen Replacement: crwdns2935265:00crwdnd2935265:01crwdnd2935265:03crwdne2935265:0 Sony Vaio VGN-FS640 LCD Screen Replacement: crwdns2935265:00crwdnd2935265:02crwdnd2935265:03crwdne2935265:0 Sony Vaio VGN-FS640 LCD Screen Replacement: crwdns2935265:00crwdnd2935265:03crwdnd2935265:03crwdne2935265:0
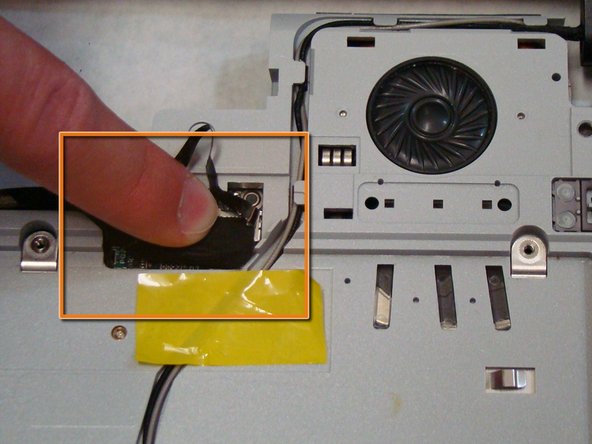
  • Once the new screen and its cables are securely in place, attach the three cables to their corresponding ports.

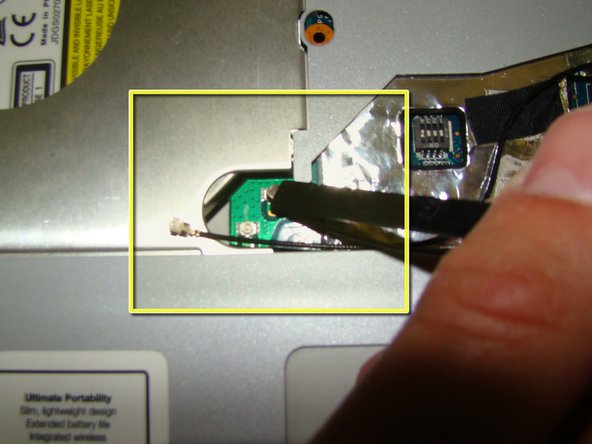
  • For each cable, place the connector on top of the port and align the two as close as possible.

  • To connect the power cable, use your finger to push downward on the middle of the connector until it snaps into place.

  • To connect each display cable, use the flat end of a spudger to press on the top of the silver connector until it snaps into place.

  • Snapping the connectors into place does require a little bit of force, but be careful, too much force can break the motherboard. If the connector doesn't snap into place with a moderate amount of force, realign it and try again.

  • Make sure the two display cables are connected to the correct ports. The grey cable should connect closest to the screen.

crwdns2935429:0crwdne2935429:0

crwdns2935429:0crwdne2935429:0

crwdns2935429:0crwdne2935429:0

crwdns2935429:0crwdne2935429:0

crwdns2935429:0crwdne2935429:0

crwdns2935429:0crwdne2935429:0

crwdns2944171:0crwdnd2944171:0crwdnd2944171:0crwdnd2944171:0crwdne2944171:0