crwdns2933423:0crwdne2933423:0

TI-36X Pro Button Replacement

crwdns2931527:0crwdnd2931527:0crwdnd2931527:0crwdnd2931527:0crwdne2931527:0

crwdns2936315:0crwdne2936315:0
crwdns2936323:0crwdne2936323:0
crwdns2931653:04crwdne2931653:0
TI-36X Pro Button Replacement: crwdns2935265:00crwdnd2935265:01crwdnd2935265:03crwdne2935265:0 TI-36X Pro Button Replacement: crwdns2935265:00crwdnd2935265:02crwdnd2935265:03crwdne2935265:0 TI-36X Pro Button Replacement: crwdns2935265:00crwdnd2935265:03crwdnd2935265:03crwdne2935265:0
  • When removing the parts from the calculator be careful not to break any wires or ribbons. The solar panel, screen, and lower circuit board should remain connected throughout this guide.

  • Lift the top edge of the solar panel with a finger and slide it away from the circuit board to disconnect it from the calculator.

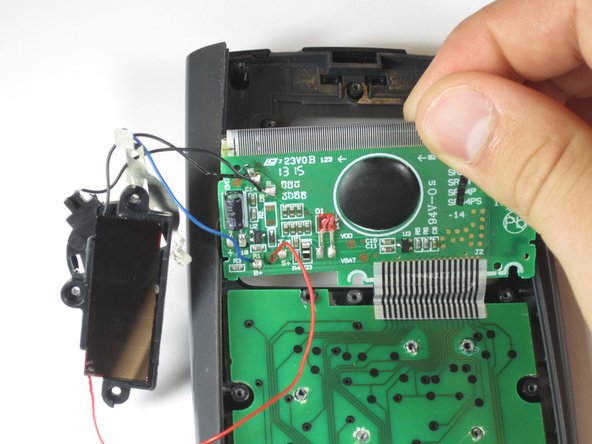
  • Carefully pry the screen out of the calculator with a prying tool or spudger.

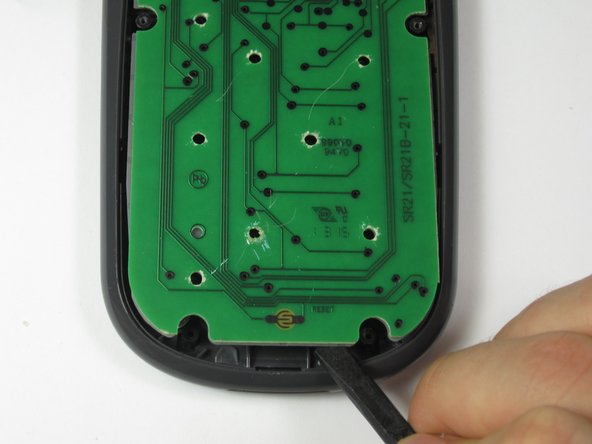
  • Pry the lower circuit board from the calculator by inserting a prying tool between the base of the calculator and the circuit board.

crwdns2935429:0crwdne2935429:0

crwdns2935429:0crwdne2935429:0

crwdns2935429:0crwdne2935429:0

crwdns2935429:0crwdne2935429:0

crwdns2944171:0crwdnd2944171:0crwdnd2944171:0crwdnd2944171:0crwdne2944171:0