crwdns2933423:0crwdne2933423:0

DualShock 4(CUH-ZCT1U)のフロントケースの交換

crwdns2935425:01crwdne2935425:0

crwdns2936315:0crwdne2936315:0
crwdns2936323:0crwdne2936323:0
crwdns2931653:01crwdne2931653:0
DualShock 4 (CUH-ZCT1U) Front Case Replacement: crwdns2935265:00crwdnd2935265:01crwdnd2935265:03crwdne2935265:0 DualShock 4 (CUH-ZCT1U) Front Case Replacement: crwdns2935265:00crwdnd2935265:02crwdnd2935265:03crwdne2935265:0 DualShock 4 (CUH-ZCT1U) Front Case Replacement: crwdns2935265:00crwdnd2935265:03crwdnd2935265:03crwdne2935265:0
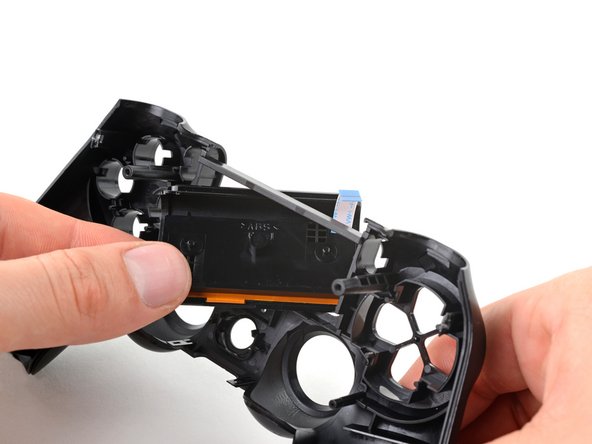
  • Lift the bottom edge of the touch pad.

  • Rotate the touch pad and slide it through its cutout in the front case to remove it.

  • You're now left with the front case.

  • During reassembly, make sure the cable doesn't get stuck under the cutout in the front case.

タッチパッドの下側端を持ち上げます。

タッチパッドを回転させ、フロントケースの切り込みからスライドさせて取り外します。

これでフロントケースのみが残ります。

再組み立ての際、ケーブルがフロントケースの切り欠きの下に挟まらないように注意してください。

crwdns2944171:0crwdnd2944171:0crwdnd2944171:0crwdnd2944171:0crwdne2944171:0