crwdns2933423:0crwdne2933423:0

Reemplazo de la carcasa frontal del DualShock 4

crwdns2935425:01crwdne2935425:0

crwdns2936315:0crwdne2936315:0
crwdns2936331:0crwdne2936331:0
crwdns2931653:01crwdne2931653:0
DualShock 4 (CUH-ZCT1U) Front Case Replacement: crwdns2935265:00crwdnd2935265:01crwdnd2935265:03crwdne2935265:0 DualShock 4 (CUH-ZCT1U) Front Case Replacement: crwdns2935265:00crwdnd2935265:02crwdnd2935265:03crwdne2935265:0 DualShock 4 (CUH-ZCT1U) Front Case Replacement: crwdns2935265:00crwdnd2935265:03crwdnd2935265:03crwdne2935265:0
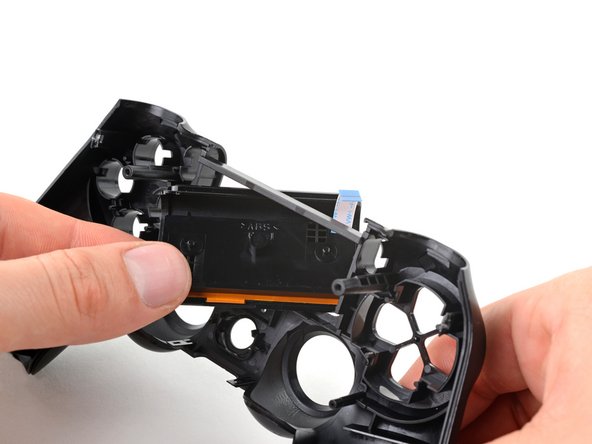
  • Lift the bottom edge of the touch pad.

  • Rotate the touch pad and slide it through its cutout in the front case to remove it.

  • You're now left with the front case.

  • During reassembly, make sure the cable doesn't get stuck under the cutout in the front case.

Levanta el borde inferior del panel táctil.

Gira la almohadilla táctil y deslízala a través de su corte en la carcasa frontal para retirarla.

Ahora te queda la carcasa frontal.

Durante el reensamblaje, asegúrate de que el cable no se atasque debajo del corte en la carcasa frontal.

crwdns2944171:0crwdnd2944171:0crwdnd2944171:0crwdnd2944171:0crwdne2944171:0