crwdns2931529:0crwdnd2931529:0crwdnd2931529:0crwdnd2931529:02crwdnd2931529:0crwdne2931529:0
crwdns2935425:02crwdne2935425:0
crwdns2931653:02crwdne2931653:0


-
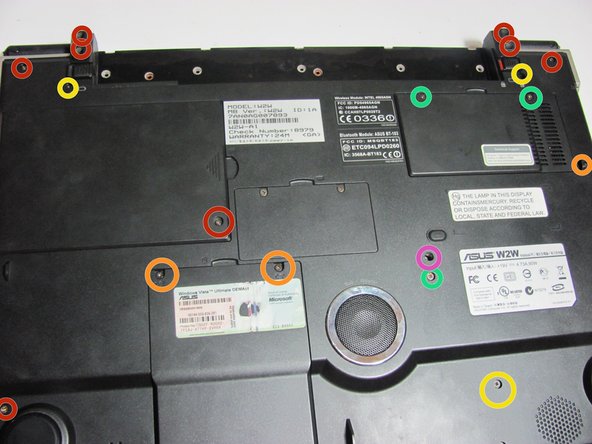
Unscrew the six 17 mm Phillips head screws on the stands on the back and the 2 "A" screws of the same size adjacent to the stands.
-
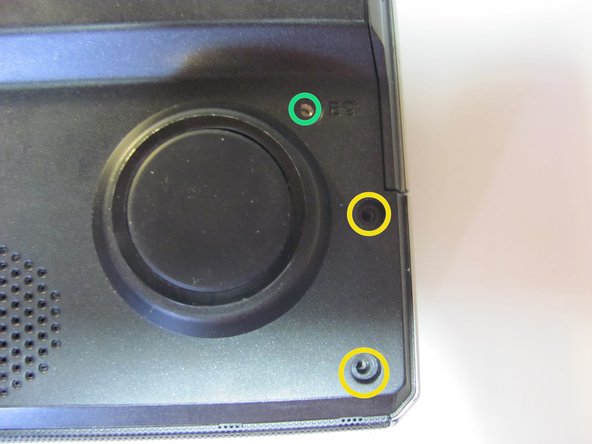
Unscrew the two C Phillips head screws on the hard drive panel. There is also one more C screw in the upper right corner of the laptop as shown.
-
Unscrew the eight 8mm lock phillips screws and the screws along the outside of the laptop.
-
Unscrew the three 3mm E Phillips screw and the one 3mm D Phillips screw.
-
Unscrew the 5mm Phillips head screw that lies just above the D screw.
crwdns2944171:0crwdnd2944171:0crwdnd2944171:0crwdnd2944171:0crwdne2944171:0