crwdns2933423:0crwdne2933423:0

iPad Air Wi-Fi フロントパネルの交換

crwdns2931529:0crwdnd2931529:0crwdnd2931529:0crwdnd2931529:076crwdnd2931529:0crwdne2931529:0

crwdns2936315:0crwdne2936315:0
crwdns2936323:0crwdne2936323:0
crwdns2931653:023crwdne2931653:0
iPad Air Wi-Fi Front Panel Replacement: crwdns2935265:00crwdnd2935265:01crwdnd2935265:03crwdne2935265:0 iPad Air Wi-Fi Front Panel Replacement: crwdns2935265:00crwdnd2935265:02crwdnd2935265:03crwdne2935265:0 iPad Air Wi-Fi Front Panel Replacement: crwdns2935265:00crwdnd2935265:03crwdnd2935265:03crwdne2935265:0
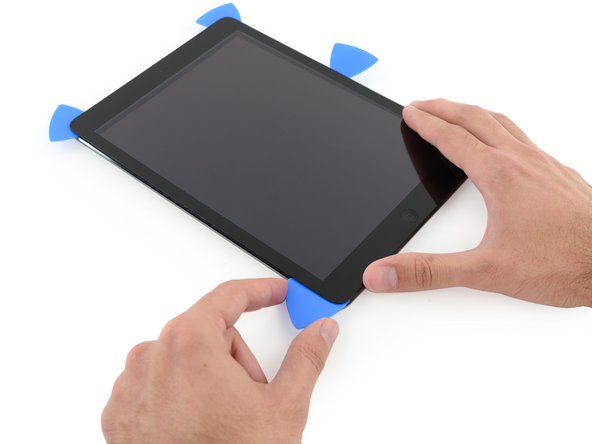
  • Slide the lower left pick to the lower left corner to cut the adhesive on that corner.

  • Leave the pick at the corner. Do not pry any farther, and do not remove the pick from the iPad.

  • The third image shows the two antennas and the home button cavity in the lower case of the iPad.

  • The following steps will direct you where to pry to avoid damage to these components. Only apply heat and pry where directed.

左側中央に差し込んでいる開口ピックを左側下部の角に向かって、接着剤を剥がしながらスライドしていきます。

左側下部の角でピックを残したまま止めます。これ以上こじ開けないでください。iPadにピックを挟んだままにします。

3番目の画像はiPadの下部分に装着されている2本のアンテナとホームボタンの様子です。

次の手順ではこれらのコンポーネントにダメージを与えないために、どこからこじ開ければよいのかを教示しています。iOpenerを温めて、指定された場所をこじ開けてください。

crwdns2944171:0crwdnd2944171:0crwdnd2944171:0crwdnd2944171:0crwdne2944171:0