crwdns2933423:0crwdne2933423:0

DualShock 4-controller demonteren

crwdns2931529:0crwdnd2931529:0crwdnd2931529:0crwdnd2931529:08crwdnd2931529:0crwdne2931529:0

crwdns2935425:03crwdne2935425:0

crwdns2936315:0crwdne2936315:0
crwdns2936313:0crwdne2936313:0
crwdns2931653:03crwdne2931653:0
Disassembling DualShock 4 Controller: crwdns2935265:00crwdnd2935265:01crwdnd2935265:03crwdne2935265:0 Disassembling DualShock 4 Controller: crwdns2935265:00crwdnd2935265:02crwdnd2935265:03crwdne2935265:0 Disassembling DualShock 4 Controller: crwdns2935265:00crwdnd2935265:03crwdnd2935265:03crwdne2935265:0
  • Wedge a plastic opening tool into the case-splittings and pull down to crack open the casing near the following buttons:

  • Share button

  • Options button

  • Split the plastic covers of the controller apart, taking note that they will still be attached by circuit board ribbons.

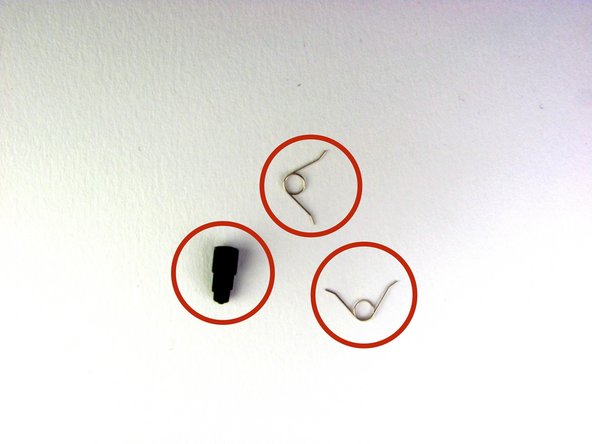
  • Three small pieces are often released from the framework. To prevent loss, maintain a controlled work field.

  • 2 Trigger Springs

  • 1 Grey Reset Button Extension

Duw een plastic openingstool in de opening tussen de twee delen van de behuizing en duw het uiteinde van je tool omlaag om de behuizing bij de volgende knoppen te openen:

De Share-knop.

De Options-knop.

Scheid de twee delen van de plastic behuizing van de controller, maar onthoud wel dat deze nog steeds met elkaar verbonden zijn door middel van lintkabels die aan de printplaten vastzitten.

De kans is groot dat er drie kleine onderdeeltjes uit het framewerk vallen (zie derde foto). Zorg dat je een schone werktafel hebt, zodat je deze onderdelen niet verliest.

2 Triggerveren

1 Grijze resetknopverlenger

crwdns2944171:0crwdnd2944171:0crwdnd2944171:0crwdnd2944171:0crwdne2944171:0