crwdns2933423:0crwdne2933423:0

Étrier de frein Mercedes W123, remplacement arrière

crwdns2936315:0crwdne2936315:0
crwdns2936317:0crwdne2936317:0
crwdns2931653:04crwdne2931653:0
Mercedes W123 Brake Caliper, Rear Replacement: crwdns2935265:00crwdnd2935265:01crwdnd2935265:02crwdne2935265:0 Mercedes W123 Brake Caliper, Rear Replacement: crwdns2935265:00crwdnd2935265:02crwdnd2935265:02crwdne2935265:0
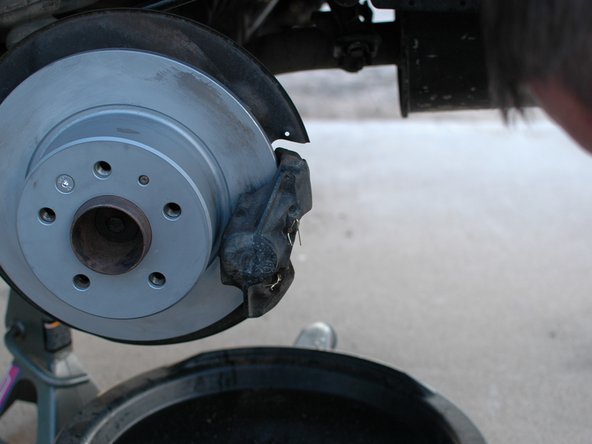
  • After you have completed your work on the caliper, such as removing the old pads, and cleaning them up, they can be re-installed. Or, if you have new calipers, this is the time to install them.

  • Before installing the caliper bolts be sure to apply some thread locker to them. Use the blue thread locker than can be removed with hand tools, not the red thread locker as that needs heat to remove.

  • Hold the caliper up on the rotor and line the holes in the caliper up with the bolt holes in the steering knuckle. Get the first bolt started by hand.

  • Then, start the second bolt by hand as well. Doing so helps ensure they do not become cross-threaded.

Une fois que vous avez terminé votre travail sur l'étrier, comme retirer les anciens patins et les nettoyer, ils peuvent être réinstallés. Ou, si vous avez de nouveaux étriers, c'est le moment de les installer.

Avant d'installer les boulons de l'étrier, assurez-vous de leur appliquer un peu de frein-filet. Utilisez le frein-fil bleu qui peut être retiré avec des outils manuels, et non le frein-fil rouge car il a besoin de chaleur pour être retiré.

Maintenez l'étrier sur le disque et alignez les trous de l'étrier avec les trous de boulons dans la fusée d'essieu. Démarrez le premier boulon à la main

Ensuite, démarrez également le deuxième boulon à la main. Cela permet de garantir qu'ils ne deviennent pas croisés.

crwdns2944171:0crwdnd2944171:0crwdnd2944171:0crwdnd2944171:0crwdne2944171:0