crwdns2933423:0crwdne2933423:0

Reparatie van een voedingsadapter

crwdns2936315:0crwdne2936315:0
crwdns2936313:0crwdne2936313:0
crwdns2931653:02crwdne2931653:0
Power Brick Cord Repair, Crack the Case Open: crwdns2935265:00crwdnd2935265:01crwdnd2935265:03crwdne2935265:0 Power Brick Cord Repair, Crack the Case Open: crwdns2935265:00crwdnd2935265:02crwdnd2935265:03crwdne2935265:0 Power Brick Cord Repair, Crack the Case Open: crwdns2935265:00crwdnd2935265:03crwdnd2935265:03crwdne2935265:0
Crack the Case Open
  • This is the trickiest step of the procedure. You want to crack open the power brick's plastic case along the existing seam, without cosmetically ruining it. Ideally, nobody will be able to tell that you opened up the case but--even if you are very careful--in most cases you will leave behind some minor scars on the plastic.

  • Sometimes you get lucky and the power brick case is held together by screws. Sometimes these screws are hidden underneath printed labels. If there are labels on the power brick, press your fingertips against the label, feeling for small screw holes hidden underneath.

  • If you discover screw holes, either peel back the label or else punch through the label to reveal the holes. You have to decide which is cosmetically better. Then use the appropriate screwdriver to remove all screws. Take careful note of which screw comes out of which hole, in case some are longer than the others.

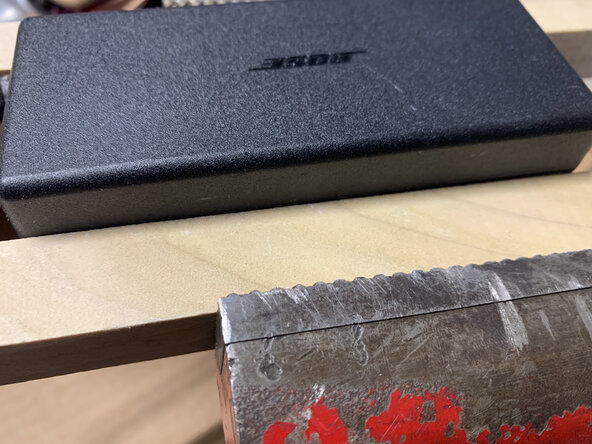
  • More likely, the power brick is glued together, as is the case with the pictured Bose power brick. To carefully break this glued joint: Using wood blocks to avoid marring the plastic, place the unit into a bench vise and tighten until you hear light popping sounds of the glued joint giving way. Note how the case seam bulges upwards (first photo).

  • With the vise, alternately squeeze the upper and lower halves of the case in different places and different directions (second photo). Try squeezing at the corners, along the end, and just in the middle of the case. Eventually the seam will split open enough for you to pry the case open with your nails (third photo).

Dit is de lastigste stap van de procedure. Je wilt de plastic behuizing van de voedingsadapter langs de bestaande naad openbreken, zonder deze cosmetisch te beschadigen. Idealiter zal niemand kunnen zien dat je de behuizing hebt geopend, maar zelfs als je heel voorzichtig bent, laat je in de meeste gevallen kleine krasjes op het plastic achter.

Soms heb je geluk en zit de behuizing van de voedingsadapter vast met schroeven. Soms zitten deze schroeven verborgen onder bedrukte labels. Als er labels op de voedingsadapter zitten, druk dan met je vingertoppen tegen het label en voel of er kleine schroefgaatjes onder zitten.

Als je schroefgaten ontdekt, pel dan het label los of prik erdoorheen om de gaten zichtbaar te maken. Je moet beslissen wat cosmetisch gezien het beste is. Gebruik vervolgens de juiste schroevendraaier om alle schroeven te verwijderen. Let goed op welke schroef uit welk gat komt, voor het geval sommige langer zijn dan andere.

Waarschijnlijk is de voedingsadapter gelijmd. Om deze lijmverbinding voorzichtig te verbreken: Gebruik houten blokjes om het plastic niet te beschadigen, plaats het apparaat in een bankschroef en draai het vast totdat je een licht ploppend geluid hoort wanneer de lijmverbinding loslaat. Let op hoe de naad van de behuizing omhoog komt (eerste foto).

Knijp met de bankschroef afwisselend de bovenste en onderste helft op verschillende plaatsen en in verschillende richtingen (tweede foto). Probeer te knijpen op de hoeken, langs het uiteinde en precies in het midden. Uiteindelijk zal de naad voldoende openbarsten om de behuizing met je nagels open te wrikken (derde foto).

crwdns2944171:0crwdnd2944171:0crwdnd2944171:0crwdnd2944171:0crwdne2944171:0