crwdns2935425:06crwdne2935425:0
crwdns2931653:06crwdne2931653:0


Removing the heatsink assembly
-
To start, loosen the 6 screws holding the heatsink pressed down. The numbers don't matter, these are for when you put the heatsink assembly back in.
-
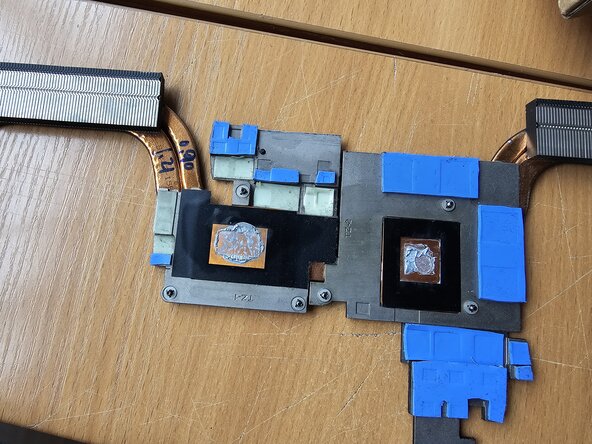
Once you're sure the screws are loosened, lift the heatsink assembly up and away from the laptop by holding it for its furthermost right and left ends. Be careful not to bend or damage anything. Place the heatsink assembly upside down.
-
This would be a good time to perform thermal paste clean up. Use your thermal paste cleaner or >90% isopropyl alcohol together with cotton swabs and cotton balls (or a microfiber cloth) to clean the thermal paste from all 4 surfaces.
crwdns2944171:0crwdnd2944171:0crwdnd2944171:0crwdnd2944171:0crwdne2944171:0