crwdns2935425:04crwdne2935425:0


-
Speaker: Insert it back into the hole with the two connection pads on the outside edge and snap the metal clip back into place.
-
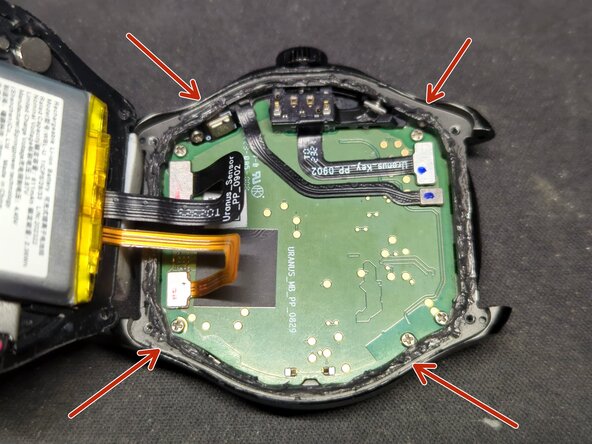
Ribbon Cables: Aligning the connectors can be a little tricky, I found it easiest to gently flex the connectors away from the battery and adjust the angle of the connectors. (See first image)
-
Gasket \ Seal: This is a critical part of the reassembly as it will protect the internal components from water and moisture damage.
-
Using a toothpick, apply a thin strip of the the RTV Silicone around the edge of the watch.
-
Applying the silicone under the ribbon cables will be the trickiest part. I achieved this by saving this part for last and holding the bottom half of the watch above the other, ready to put it in place as soon as I was done.
-
I placed a pee size glob of silicone onto a post-it note. Then by rolling the tip of the toothpick in it, I could get a small amount that was easy to apply with relative precision.
-
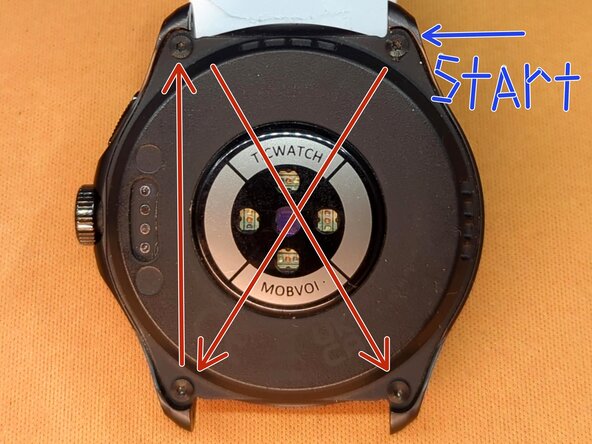
With the seal in place the top and bottom should gently snap back together. When reinserting the screws gently tighten them in a cross pattern and do not over tighten.
crwdns2944171:0crwdnd2944171:0crwdnd2944171:0crwdnd2944171:0crwdne2944171:0