crwdns2915892:0crwdne2915892:0
This is a simple teardown of the TicWatch Pro 5.
I performed this after a long day if yard work and noticing distorted notification sounds.
Warning!: After performing this teardown, while the sound issue was resolved the haptics stopped working and I have been unable to identify the cause or solution.
crwdns2942213:0crwdne2942213:0
-
-
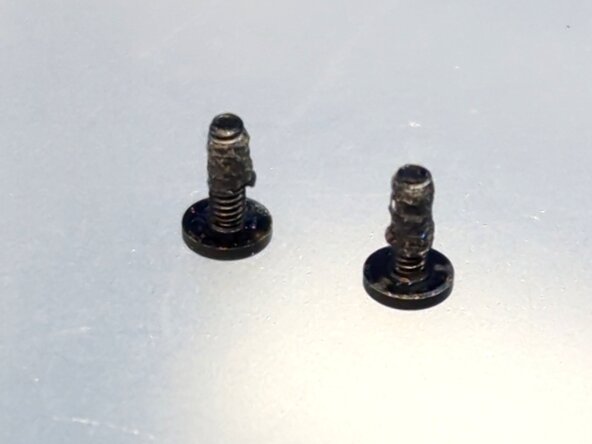
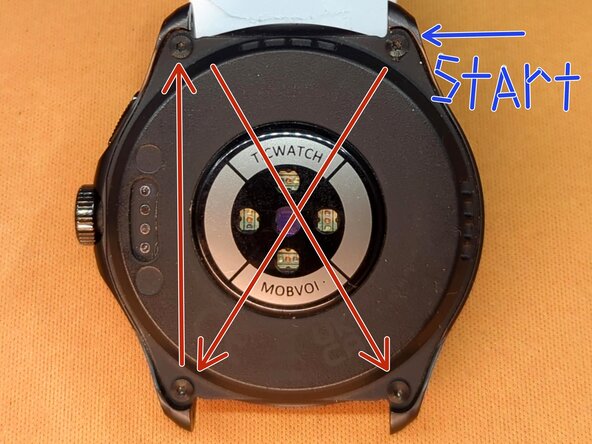
There are four T4 screws located on the back of the watch that are removed to allow the two halves to come apart (Circled in Picture). The screws have a little of the silicone gasket around them that you may want to clean of to make re-installation easier later.
-
Though it appears to be designed for a T4, I found it easier to work with the T3.
-
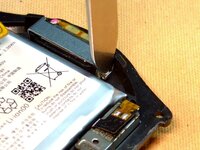
Once the screws are removed you will need to separate the top and bottom. There is a silicone gasket/seal that is holding the two halves together. I was able to use the blade of a hobby knife in a small gap at the top of the watch, closest to the 4 holes (Arrow in Picture).
-
This appears to be the safest starting point since the sensor you are most likely to clip, if you slip through the gasket quicker than expected, is protected by a metal casing.
-
As a gap is created insert another flat pry tool, into the gap so you can use the two to work your way around the edge gently cutting or peeling away the gasket/seal.
-
There are four plastic clips that help hold the top and bottom together without the screws.
-
-
-
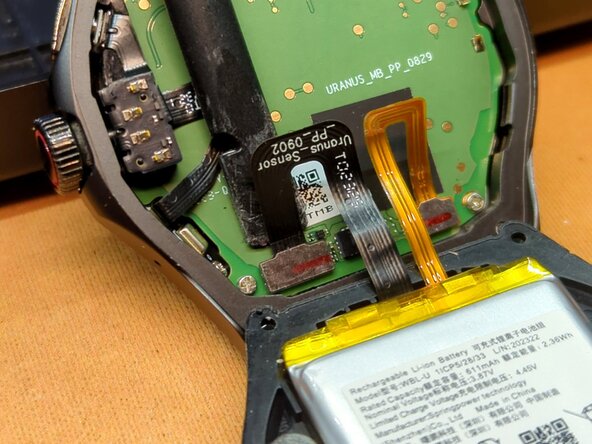
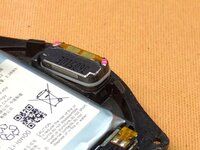
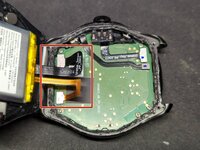
With the watch open you will be able to see the two ribbon cables connecting the top and bottom of the watch (red square).
-
Using a flat tool you can gently separate the cables from the top of the watch.
-
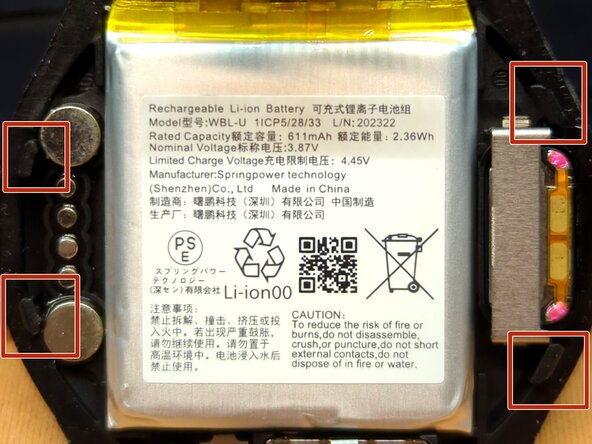
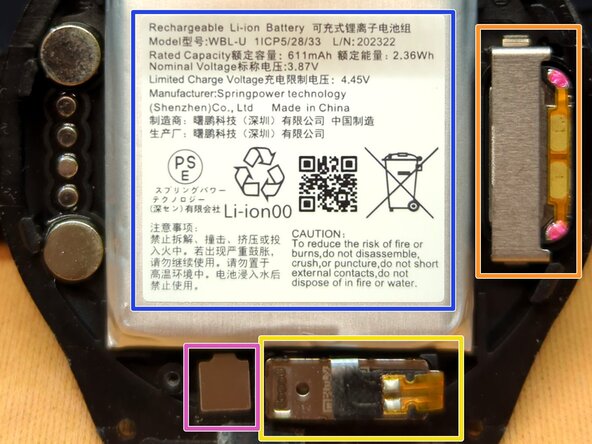
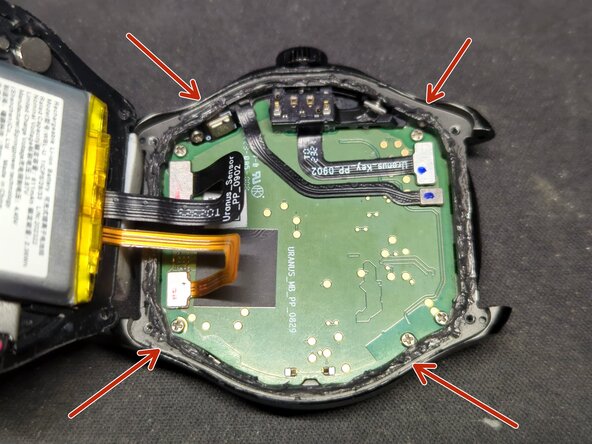
Parts on the bottom half of the watch that I could identify.
-
Battery: Held in place by double sided tape. (Center of the watch, blue square).
-
Speaker: Additional details in Step 3. (Right edge, orange square).
-
Step/Pedometer Sensor: Connected through the black ribbon cable. (Right side of the bottom edge, yellow square.)
-
Unknown Sensor: This might be a small proximity or pressure sensor, but I'm unsure. It is connected to the black ribbon cable. (Left side of the bottom edge, pink square.)
-
-
-
-
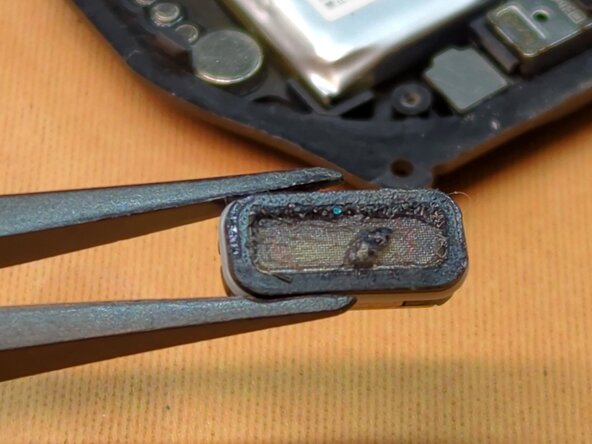
The speaker is held in place by a metal clip that must be flexed outward to remove.
-
Removal of the speaker will take a little effort because of the gasket around it. I was able to get it out by gently prying opposite edges and slowly wiggling it out.
-
The bottom of the speaker has a black gasket and mesh protecting the driver. I used a toothbrush to gently clean away the dirt and debris.
-
-
-
Speaker: Insert it back into the hole with the two connection pads on the outside edge and snap the metal clip back into place.
-
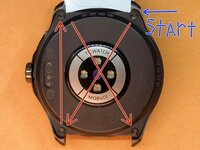
Ribbon Cables: Aligning the connectors can be a little tricky, I found it easiest to gently flex the connectors away from the battery and adjust the angle of the connectors. (See first image)
-
Gasket \ Seal: This is a critical part of the reassembly as it will protect the internal components from water and moisture damage.
-
Using a toothpick, apply a thin strip of the the RTV Silicone around the edge of the watch.
-
Applying the silicone under the ribbon cables will be the trickiest part. I achieved this by saving this part for last and holding the bottom half of the watch above the other, ready to put it in place as soon as I was done.
-
I placed a pee size glob of silicone onto a post-it note. Then by rolling the tip of the toothpick in it, I could get a small amount that was easy to apply with relative precision.
-
With the seal in place the top and bottom should gently snap back together. When reinserting the screws gently tighten them in a cross pattern and do not over tighten.
-