crwdns2935425:05crwdne2935425:0
crwdns2931653:05crwdne2931653:0

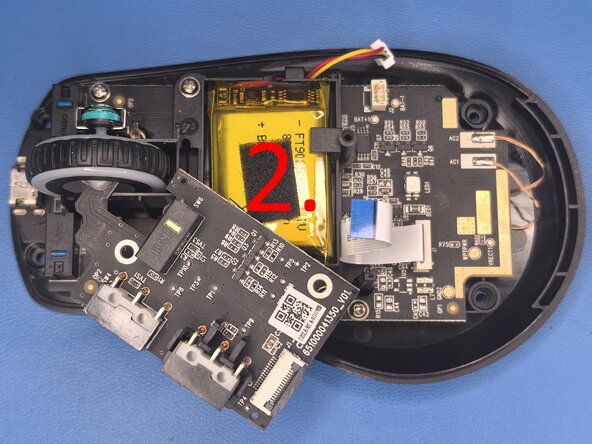


Removing 1.st PCB - Part 2
-
First, let's remove two Philips 1 screws as can be seen in the IMAGE 1.
-
Then you will have to lift the PCB for a few milimiters, and then you have to rotate the PCB for approximately 45° to slide the board out of the scroll wheel as shown in IMAGE 2.
crwdns2944171:0crwdnd2944171:0crwdnd2944171:0crwdnd2944171:0crwdne2944171:0