crwdns2933423:0crwdne2933423:0

Installation de l'adhésif sur la coque arrière du Google Pixel 9a

crwdns2931529:0crwdnd2931529:0crwdnd2931529:0crwdnd2931529:010crwdnd2931529:0crwdne2931529:0

crwdns2935425:01crwdne2935425:0

crwdns2936315:0crwdne2936315:0
crwdns2936317:0crwdne2936317:0
crwdns2931653:01crwdne2931653:0
Google Pixel 9a Rear Cover Adhesive Installation, Remove the old rear cover adhesive: crwdns2935265:00crwdnd2935265:01crwdnd2935265:03crwdne2935265:0 Google Pixel 9a Rear Cover Adhesive Installation, Remove the old rear cover adhesive: crwdns2935265:00crwdnd2935265:02crwdnd2935265:03crwdne2935265:0 Google Pixel 9a Rear Cover Adhesive Installation, Remove the old rear cover adhesive: crwdns2935265:00crwdnd2935265:03crwdnd2935265:03crwdne2935265:0
Remove the old rear cover adhesive
  • Take your time during the next two steps. A clean frame allows replacement adhesive to lay evenly, ensuring a better bond.

  • Use a spudger and tweezers to scrape up and remove all the old rear cover adhesive from the perimeter of your phone.

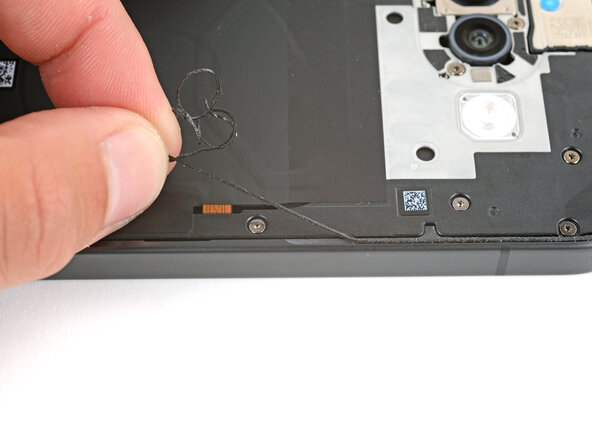
  • If you scrape up a piece big enough to grip with your fingers, you can pull long sections of the adhesive up. Pull slowly and straight in the opposite direction of the adhesive.

Prenez votre temps lors des deux étapes suivantes. Un châssis propre permet à l'adhésif de remplacement de se fixer uniformément, assurant ainsi une meilleure adhérence.

Utilisez une spatule (spudger) et une pincette pour gratter et retirer tout l'ancien adhésif de la coque arrière sur le contour de votre smartphone.

Si vous grattez un morceau d'adhésif suffisamment grand pour le saisir avec les doigts, vous pourrez retirer de longues sections en tirant lentement et droit dans le sens opposé à la partie encore collée.

crwdns2944171:0crwdnd2944171:0crwdnd2944171:0crwdnd2944171:0crwdne2944171:0