crwdns2933423:0crwdne2933423:0

Google Pixel 9a Kleber an der Rückseite anbringen

crwdns2931529:0crwdnd2931529:0crwdnd2931529:0crwdnd2931529:010crwdnd2931529:0crwdne2931529:0

crwdns2935425:01crwdne2935425:0

crwdns2936315:0crwdne2936315:0
crwdns2936319:0crwdne2936319:0
crwdns2931653:01crwdne2931653:0
Google Pixel 9a Rear Cover Adhesive Installation, Remove the old rear cover adhesive: crwdns2935265:00crwdnd2935265:01crwdnd2935265:03crwdne2935265:0 Google Pixel 9a Rear Cover Adhesive Installation, Remove the old rear cover adhesive: crwdns2935265:00crwdnd2935265:02crwdnd2935265:03crwdne2935265:0 Google Pixel 9a Rear Cover Adhesive Installation, Remove the old rear cover adhesive: crwdns2935265:00crwdnd2935265:03crwdnd2935265:03crwdne2935265:0
Remove the old rear cover adhesive
  • Take your time during the next two steps. A clean frame allows replacement adhesive to lay evenly, ensuring a better bond.

  • Use a spudger and tweezers to scrape up and remove all the old rear cover adhesive from the perimeter of your phone.

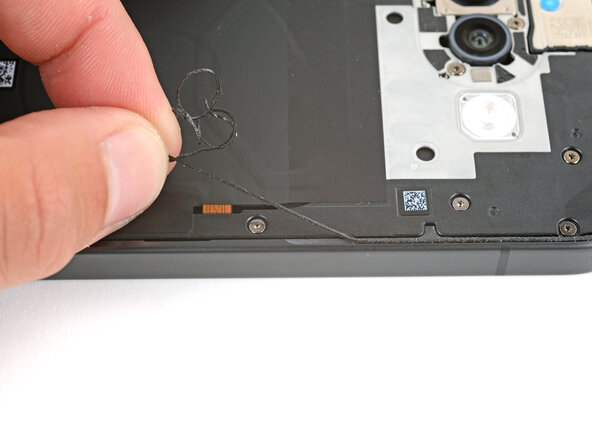
  • If you scrape up a piece big enough to grip with your fingers, you can pull long sections of the adhesive up. Pull slowly and straight in the opposite direction of the adhesive.

Lasse dir Zeit bei den nächsten beiden Schritten. Ein sauberer Rahmen ermöglicht es, den Kleber flach und gleichmäßig aufzulegen, so dass er gut haftet.

Schabe alle Reste vom Kleber mit einem Spudger und einer Pinzette am Rand der Rückseite ab.

Wenn es dir gelingt, ein größeres Stück des Klebers so zusammenzufassen, dass du es mit den Fingern greifen kannst, kannst du längere Teilstücke des Klebers auf einmal abziehen. Ziehe den Kleber langsam und gerade in Gegenrichtung ab.

crwdns2944171:0crwdnd2944171:0crwdnd2944171:0crwdnd2944171:0crwdne2944171:0