crwdns2933423:0crwdne2933423:0

Application d'adhésif sur la coque intérieure du Google Pixel 9a (toutes réparations)

crwdns2931529:0crwdnd2931529:0crwdnd2931529:0crwdnd2931529:09crwdnd2931529:0crwdne2931529:0

crwdns2936315:0crwdne2936315:0
crwdns2936317:0crwdne2936317:0
crwdns2931653:02crwdne2931653:0
Google Pixel 9a Inner Housing Adhesive Application (All Repairs), Apply the adhesive: crwdns2935265:00crwdnd2935265:01crwdnd2935265:03crwdne2935265:0 Google Pixel 9a Inner Housing Adhesive Application (All Repairs), Apply the adhesive: crwdns2935265:00crwdnd2935265:02crwdnd2935265:03crwdne2935265:0 Google Pixel 9a Inner Housing Adhesive Application (All Repairs), Apply the adhesive: crwdns2935265:00crwdnd2935265:03crwdnd2935265:03crwdne2935265:0
Apply the adhesive
  • Remove the larger, clear liner from the inner housing adhesive and lay it in place around the camera holes.

  • Use the cutouts for the small silver pads to help align the adhesive.

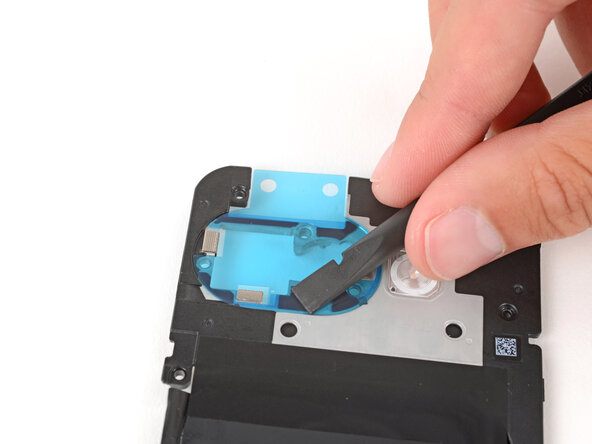
  • Use the flat end of a spudger to firmly push down on each piece of adhesive, securing them in place.

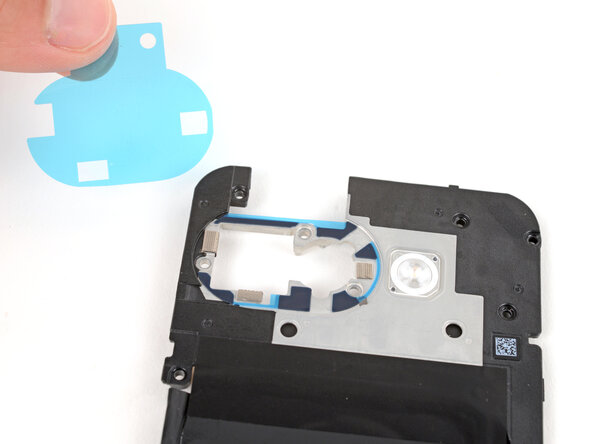
  • Remove the colored liner using the pull tab on the top edge.

  • If the adhesive starts to pull up with the liner, lay it back in place and use your spudger to secure it again.

Retirez la plus grande protection transparente de l'adhésif et placez celui-ci (seconde protection plastique vers le haut) sur la coque intérieure (autour des trous de fixation des caméras, dans notre exemple).

Pour les caméras, utilisez les découpes pour les petits tampons argentés pour vous aider à aligner l'adhésif.

Appuyez fermement sur chaque morceau d’adhésif avec l’extrémité plate d’une spatule (spudger). L'adhésif est alors fixé sur la coque intérieure.

Retirez la protection colorée à l'aide de la languette située sur le bord supérieur.

Si l'adhésif commence à se décoller avec la protection, remettez-la en place et utilisez votre spatule (spudger) pour le fixer à nouveau.

crwdns2944171:0crwdnd2944171:0crwdnd2944171:0crwdnd2944171:0crwdne2944171:0