crwdns2933423:0crwdne2933423:0

Aplicación de adhesivo en la carcasa interior del Google Pixel 9a (todas las reparaciones)

crwdns2931529:0crwdnd2931529:0crwdnd2931529:0crwdnd2931529:09crwdnd2931529:0crwdne2931529:0

crwdns2936315:0crwdne2936315:0
crwdns2936331:0crwdne2936331:0
crwdns2931653:02crwdne2931653:0
Google Pixel 9a Inner Housing Adhesive Application (All Repairs), Apply the adhesive: crwdns2935265:00crwdnd2935265:01crwdnd2935265:03crwdne2935265:0 Google Pixel 9a Inner Housing Adhesive Application (All Repairs), Apply the adhesive: crwdns2935265:00crwdnd2935265:02crwdnd2935265:03crwdne2935265:0 Google Pixel 9a Inner Housing Adhesive Application (All Repairs), Apply the adhesive: crwdns2935265:00crwdnd2935265:03crwdnd2935265:03crwdne2935265:0
Apply the adhesive
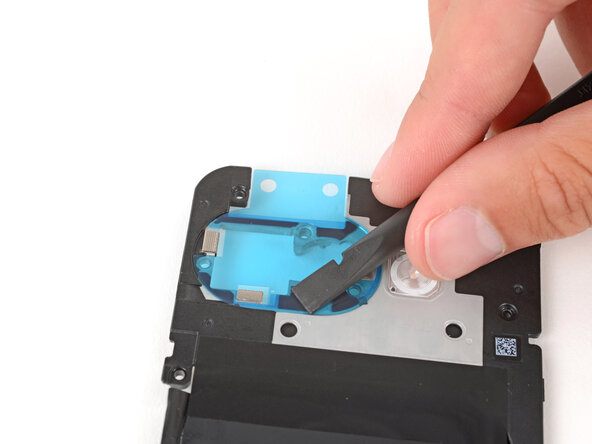
  • Remove the larger, clear liner from the inner housing adhesive and lay it in place around the camera holes.

  • Use the cutouts for the small silver pads to help align the adhesive.

  • Use the flat end of a spudger to firmly push down on each piece of adhesive, securing them in place.

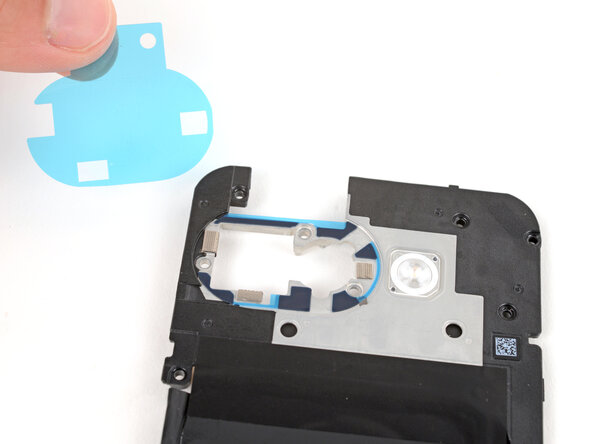
  • Remove the colored liner using the pull tab on the top edge.

  • If the adhesive starts to pull up with the liner, lay it back in place and use your spudger to secure it again.

Retira el revestimiento transparente más grande del adhesivo de la carcasa interior y colócalo alrededor de los orificios de la cámara.

Utiliza los recortes de las pequeñas almohadillas plateadas para ayudar a alinear el adhesivo.

Utiliza el extremo plano de un spudger para presionar firmemente cada trozo de adhesivo y fijarlos en su sitio.

Retire el revestimiento de color con la lengüeta situada en el borde superior.

Si el adhesivo empieza a despegarse con el revestimiento, colócalo en su sitio y vuelve a fijarlo con el spudger.

crwdns2944171:0crwdnd2944171:0crwdnd2944171:0crwdnd2944171:0crwdne2944171:0