crwdns2933423:0crwdne2933423:0

Google Pixel 9a Akku ausbauen

crwdns2931527:0crwdnd2931527:0crwdnd2931527:0crwdnd2931527:0crwdne2931527:0

crwdns2936315:0crwdne2936315:0
crwdns2936319:0crwdne2936319:0
crwdns2931653:05crwdne2931653:0
Google Pixel 9a Battery Removal, Separate the battery adhesive: crwdns2935265:00crwdnd2935265:01crwdnd2935265:03crwdne2935265:0 Google Pixel 9a Battery Removal, Separate the battery adhesive: crwdns2935265:00crwdnd2935265:02crwdnd2935265:03crwdne2935265:0 Google Pixel 9a Battery Removal, Separate the battery adhesive: crwdns2935265:00crwdnd2935265:03crwdnd2935265:03crwdne2935265:0
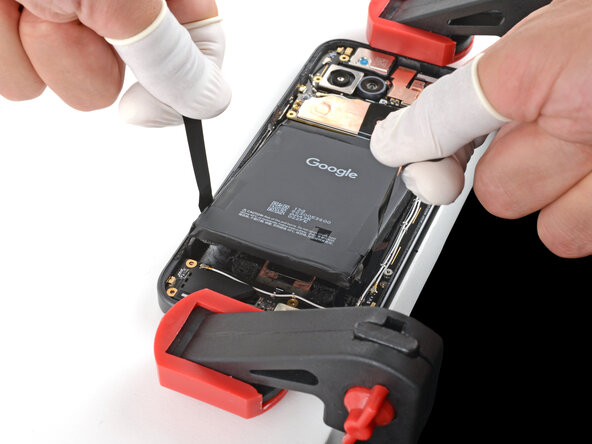
Separate the battery adhesive
  • Pull straight up on the battery pull tabs and apply constant, steady pressure until the battery separates from the frame. Don't yank on the tabs or the may rip.

  • If the battery doesn't separate after one minute of steady pressure, apply more heat and try again.

  • Remove the battery.

  • Never reuse a deformed or damaged battery—it's a fire hazard. Replace it with a new battery.

  • If you successfully removed the battery, congratulations! Skip down five steps for reassembly information.

  • If the pull tabs broke or accidentally slipped out from under the battery, don't worry! Go to the next step for an alternate battery removal method.

Ziehe fest und gleichmäßig an den Zuglaschen nach oben, bis sich der Akku vom Rahmen löst. Rüttle nicht an den Laschen, sie könnten reißen.

Wenn sich der Akku nach einer Minute immer noch nicht löst, dann erwärme nochmals und versuche es erneut.

Entferne den Akku.

Verwende einen ausgebauten Akku nicht mehr, das ist ein Sicherheitsrisiko. Baue einen neuen ein.

Wenn du den Akku erfolgreich entfernen konntest, Glückwunsch! Springe fünf Schritte weiter für Informationen zum Zusammenbau.

Wenn die Zuglasche gerissen ist oder versehentlich unter dem Akku herausgerutscht ist, keine Sorge!. Im nächsten Schritt wird eine Alternativmethode gezeigt.

crwdns2944171:0crwdnd2944171:0crwdnd2944171:0crwdnd2944171:0crwdne2944171:0