crwdns2933423:0crwdne2933423:0

Google Pixel 9a Screen Replacement

crwdns2936315:0crwdne2936315:0
crwdns2936321:0crwdne2936321:0
crwdns2931653:021crwdne2931653:0
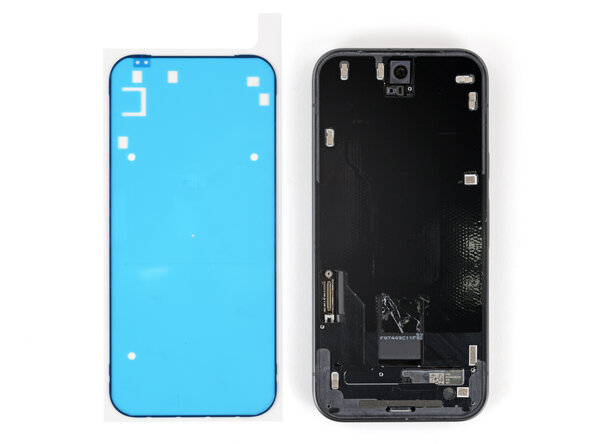
Google Pixel 9a Screen Replacement, Find the adhesive orientation: crwdns2935265:00crwdnd2935265:01crwdnd2935265:02crwdne2935265:0 Google Pixel 9a Screen Replacement, Find the adhesive orientation: crwdns2935265:00crwdnd2935265:02crwdnd2935265:02crwdne2935265:0
Find the adhesive orientation
  • Check if your replacement screen comes with adhesive pre‑installed around its perimeter. If it does, skip down six steps. If it doesn't, follow the next six steps to install new screen adhesive on the frame.

  • Before applying the screen adhesive, make sure you know how it will sit on the frame. If you apply the adhesive incorrectly, you'll need to restart with new adhesive.

  • Hold the adhesive above the frame to find its orientation. Use cutouts in the liner to help visualize how it will lay in the frame.

crwdns2935429:0crwdne2935429:0

crwdns2935429:0crwdne2935429:0

crwdns2935429:0crwdne2935429:0

crwdns2944171:0crwdnd2944171:0crwdnd2944171:0crwdnd2944171:0crwdne2944171:0