crwdns2933423:0crwdne2933423:0

Reemplazo de la batería del controlador de índice de válvula derecha

crwdns2936315:0crwdne2936315:0
crwdns2936331:0crwdne2936331:0
crwdns2931653:04crwdne2931653:0
Valve Index Controller Right Index Controller Battery Replacement, Remove the adhesive, then the battery: crwdns2935265:00crwdnd2935265:01crwdnd2935265:03crwdne2935265:0 Valve Index Controller Right Index Controller Battery Replacement, Remove the adhesive, then the battery: crwdns2935265:00crwdnd2935265:02crwdnd2935265:03crwdne2935265:0 Valve Index Controller Right Index Controller Battery Replacement, Remove the adhesive, then the battery: crwdns2935265:00crwdnd2935265:03crwdnd2935265:03crwdne2935265:0
Remove the adhesive, then the battery
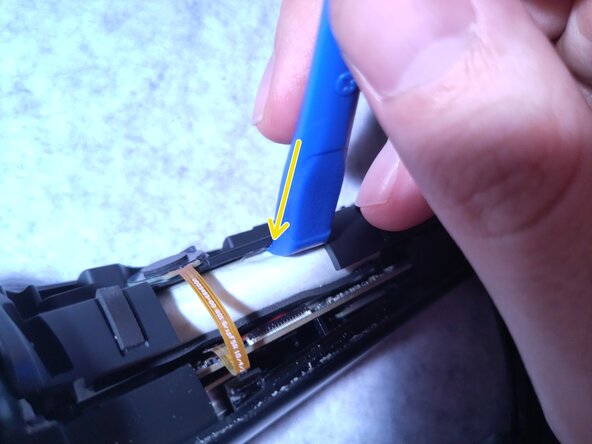
  • The battery is securely adhesed to the housing; use a hairdryer or hot air gun at moderate heat for 10 seconds to loosen the adhesive.

  • Use a plastic guitar pick or spudger to separate the adhesive from the plastic housing. There should be less resistance; if it's still not budging, re-warm the area and try again.

  • Do NOT use a sharp, metal object; this will risk puncturing the battery and causing a fire!

  • This adhesive is very tough, lasting several years. Be patient cutting through.

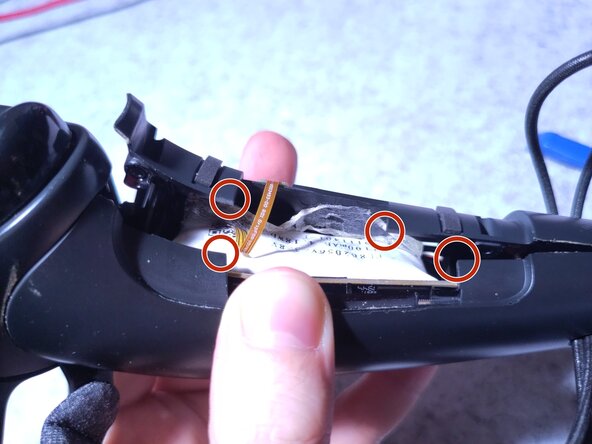
  • Once the adhesive is freed, separate the controller apart more to handle the battery, and remove it from the main handle.

  • The battery is plugged into the printed circuit board via an MX2 connector.

  • Be careful when removing! The inside chamber holding the battery has several sharp corners that could puncture the battery, and cause a fire!

La batería está bien adherida a la carcasa; utilice un secador de pelo o una pistola de aire caliente a temperatura moderada durante 10 segundos para aflojar el adhesivo.

Usa una púa de guitarra de plástico o un spudger para separar el adhesivo de la carcasa de plástico. Debería haber menos resistencia; si sigue sin desprenderse, vuelve a calentar la zona e inténtalo de nuevo.

NO utilice un objeto metálico afilado ya que podría perforar la batería y provocar un incendio.

Este adhesivo es muy resistente y dura varios años. Tenga paciencia al cortarlo.

Una vez liberado el adhesivo, separe más el controlador para poder manipular la batería y retírela del mango principal.

La batería se conecta a la placa de circuito impreso a través de un conector MX2.

¡Ten cuidado al retirarla! El compartimento interior que contiene la batería tiene varias esquinas afiladas que podrían perforarla y provocar un incendio.

crwdns2944171:0crwdnd2944171:0crwdnd2944171:0crwdnd2944171:0crwdne2944171:0