crwdns2933423:0crwdne2933423:0

Google Pixel 9a Logic Board Installation

crwdns2931529:0crwdnd2931529:0crwdnd2931529:0crwdnd2931529:06crwdnd2931529:0crwdne2931529:0

crwdns2936315:0crwdne2936315:0
crwdns2936321:0crwdne2936321:0
crwdns2931653:04crwdne2931653:0
Google Pixel 9a Logic Board Installation, Apply the thermal pads: crwdns2935265:00crwdnd2935265:01crwdnd2935265:03crwdne2935265:0 Google Pixel 9a Logic Board Installation, Apply the thermal pads: crwdns2935265:00crwdnd2935265:02crwdnd2935265:03crwdne2935265:0 Google Pixel 9a Logic Board Installation, Apply the thermal pads: crwdns2935265:00crwdnd2935265:03crwdnd2935265:03crwdne2935265:0
Apply the thermal pads
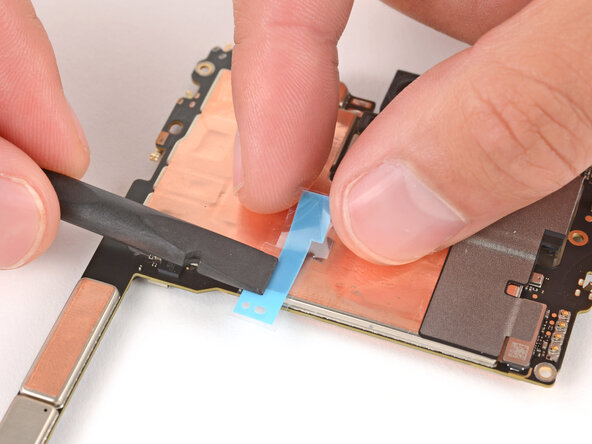
  • The thermal pads are very delicate and can easily be misaligned when placing them and removing liners. Take your time when applying them—good placement will ensure proper heat dissipation.

  • Remove the textured liner from the smaller thermal pad.

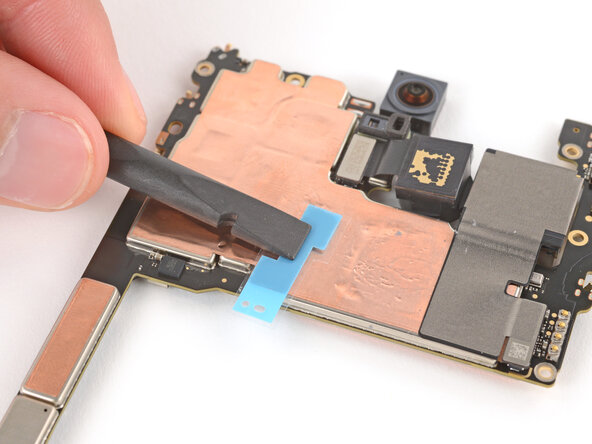
  • Carefully place the pad onto the board.

  • Use this photo as a reference to help align the pad.

  • Use the flat end of a spudger or your finger to press down lightly on the entire surface of the thermal pad, securing it in place without deforming it.

crwdns2935429:0crwdne2935429:0

crwdns2935429:0crwdne2935429:0

crwdns2935429:0crwdne2935429:0

crwdns2935429:0crwdne2935429:0

crwdns2935429:0crwdne2935429:0

crwdns2944171:0crwdnd2944171:0crwdnd2944171:0crwdnd2944171:0crwdne2944171:0