crwdns2933423:0crwdne2933423:0

Google Pixel 9a Logic Board einbauen

crwdns2931529:0crwdnd2931529:0crwdnd2931529:0crwdnd2931529:06crwdnd2931529:0crwdne2931529:0

crwdns2936315:0crwdne2936315:0
crwdns2936319:0crwdne2936319:0
crwdns2931653:04crwdne2931653:0
Google Pixel 9a Logic Board Installation, Apply the thermal pads: crwdns2935265:00crwdnd2935265:01crwdnd2935265:03crwdne2935265:0 Google Pixel 9a Logic Board Installation, Apply the thermal pads: crwdns2935265:00crwdnd2935265:02crwdnd2935265:03crwdne2935265:0 Google Pixel 9a Logic Board Installation, Apply the thermal pads: crwdns2935265:00crwdnd2935265:03crwdnd2935265:03crwdne2935265:0
Apply the thermal pads
  • The thermal pads are very delicate and can easily be misaligned when placing them and removing liners. Take your time when applying them—good placement will ensure proper heat dissipation.

  • Remove the textured liner from the smaller thermal pad.

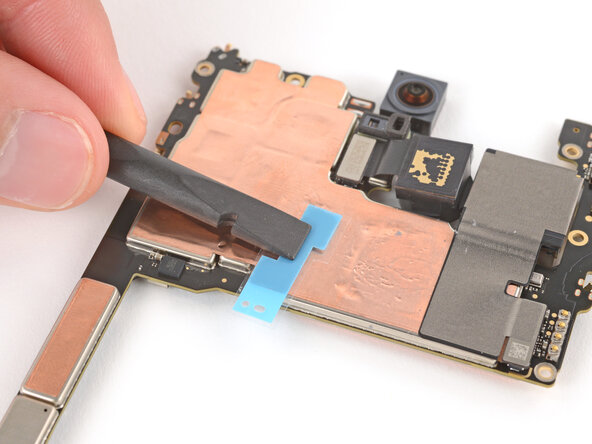
  • Carefully place the pad onto the board.

  • Use this photo as a reference to help align the pad.

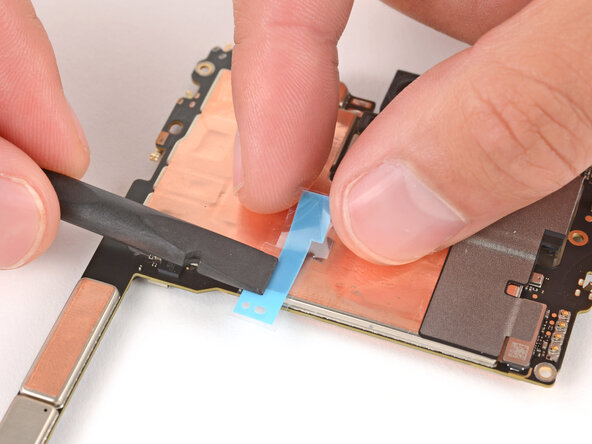
  • Use the flat end of a spudger or your finger to press down lightly on the entire surface of the thermal pad, securing it in place without deforming it.

Die Wärmeleitpads sind sehr empfindlich und es passiert leicht, dass sie beim Einbau und Entfernen der Schutzfolien von ihrem Platz rutschen. Lasse dir Zeit beim Befestigen, wenn sie korrekt sitzen, wird die Wärme besser abgeleitet.

Entferne die strukturierte Schutzfolie vom kleineren Wärmeleitpad.

Setze das Pad sorgfältig auf das Board.

Benutze dieses Foto als Orientierungshilfe.

Drücke das Wärmeleitpad leicht mit dem Finger oder einem Spudger auf der ganzen Oberfläche leicht nach unten, so dass es haftet, ohne dass seine Oberfläche eingedrückt wird.

crwdns2944171:0crwdnd2944171:0crwdnd2944171:0crwdnd2944171:0crwdne2944171:0