crwdns2933423:0crwdne2933423:0

Austausch der Plastikschnalle

crwdns2936315:0crwdne2936315:0
crwdns2936319:0crwdne2936319:0
crwdns2931653:04crwdne2931653:0
Plastic Buckle Replacement, Install the new buckle piece and test its functionality: crwdns2935265:00crwdnd2935265:01crwdnd2935265:03crwdne2935265:0 Plastic Buckle Replacement, Install the new buckle piece and test its functionality: crwdns2935265:00crwdnd2935265:02crwdnd2935265:03crwdne2935265:0 Plastic Buckle Replacement, Install the new buckle piece and test its functionality: crwdns2935265:00crwdnd2935265:03crwdnd2935265:03crwdne2935265:0
Install the new buckle piece and test its functionality
  • Check the notes or reference photo from Step 1 to make sure the orientation is correct.

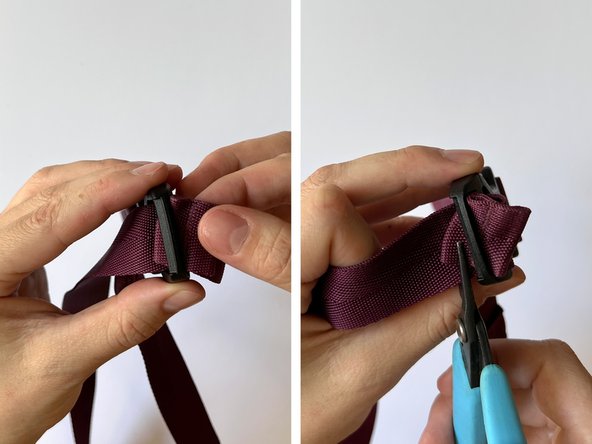
  • Repeat the technique used in Step 3 in reverse by feeding one corner of the folded webbing end into the buckle piece slot first, then using pliers to pull it all the way through.

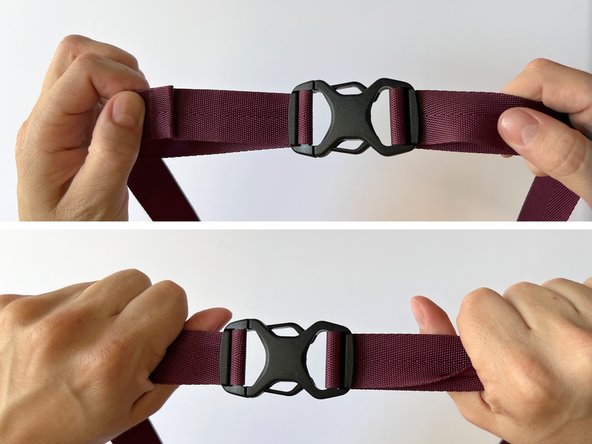
  • Pull the webbing on each side of the buckle to ensure that it holds tension on the new piece. If the webbing slides, it may be threaded incorrectly.

Achte auf die Hinweise oder das Referenzfoto aus Schritt 1, um dich zu vergewissern, dass die Ausrichtung korrekt ist.

Wiederhole die Vorgehensweise aus Schritt 3 in umgekehrter Reihenfolge, und führe eine Ecke des gefalteten Gurtbandendes mit der Öffnung voran in den Schlitz des Schnallenstücks ein. Ziehe es dann mit einer Zange vollständig durch.

Ziehe an dem Gurtband auf jeder Seite der Schnalle, um zu überprüfen, ob die Spannung auf dem neuen Teil gehalten wird. Wenn das Gurtband rutscht, ist es möglicherweise falsch eingefädelt.

crwdns2944171:0crwdnd2944171:0crwdnd2944171:0crwdnd2944171:0crwdne2944171:0