crwdns2933423:0crwdne2933423:0

Jura Z6 (2018) Open the housing

crwdns2931527:0crwdnd2931527:0crwdnd2931527:0crwdnd2931527:0crwdne2931527:0

crwdns2936319:0crwdne2936319:0
crwdns2936315:0crwdne2936315:0
crwdns2931653:02crwdne2931653:0
Jura Z6 (2018) Gehäuse öffnen, Rückseite abnehmen: crwdns2935265:00crwdnd2935265:01crwdnd2935265:03crwdne2935265:0 Jura Z6 (2018) Gehäuse öffnen, Rückseite abnehmen: crwdns2935265:00crwdnd2935265:02crwdnd2935265:03crwdne2935265:0 Jura Z6 (2018) Gehäuse öffnen, Rückseite abnehmen: crwdns2935265:00crwdnd2935265:03crwdnd2935265:03crwdne2935265:0
Rückseite abnehmen
  • Die Ovalkopfschrauben sind diesmal an der Rückseite. Fasse die gerippte Blende und hebe sie einige Millimeter nach oben. Ziehe sie dann unten heraus und hebe sie ab.

  • Diese Schrauben haben einen ovalen Kopf, der sie wie Nieten aussehen lässt (Bild 2). Man braucht zum Öffnen einen speziellen Schlüssel oder das Bit von iFixit. Hier eine Anleitung zum Selbstbau. Zur Not geht es auch mit einer Spitzzange. Jura will uns aus unseren eigenen Maschinen heraushalten!

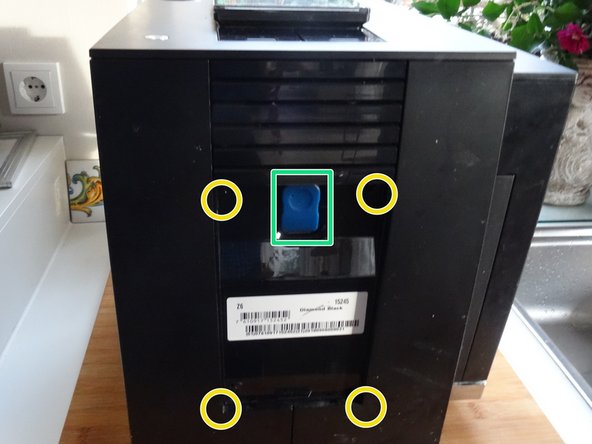
  • Drehe die vier Ovalkopfschrauben heraus.

  • Ziehe den blauen Stecker für Jura Connect ab.

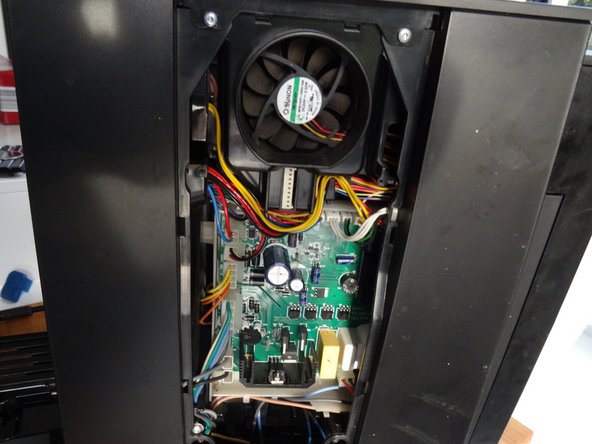
  • Hebe die schwarze Blende von der Rückseite weg. Die Leistungsplatine wird sichtbar.

The oval head screws are on the back this time. Grasp the ribbed bezel and lift it a few millimeters upwards. Then pull it out at the bottom and lift it off.

These screws have an oval head that makes them look like rivets (picture 2). You need a special key or the iFixit bit to open them. Here is a do-it-yourself guide. If necessary, you can also use pointed pliers. Jura wants to keep us out of our own machines!

Remove the four oval head screws.

Disconnect the blue plug for Jura Connect.

Lift the black panel away from the back. The power board is now visible.

crwdns2944171:0crwdnd2944171:0crwdnd2944171:0crwdnd2944171:0crwdne2944171:0