crwdns2933423:0crwdne2933423:0

Extracción del disipador de calor del HP EliteBook 840 Aero G8

crwdns2931529:0crwdnd2931529:0crwdnd2931529:0crwdnd2931529:03crwdnd2931529:0crwdne2931529:0

crwdns2935425:01crwdne2935425:0

crwdns2936315:0crwdne2936315:0
crwdns2936331:0crwdne2936331:0
crwdns2931653:01crwdne2931653:0
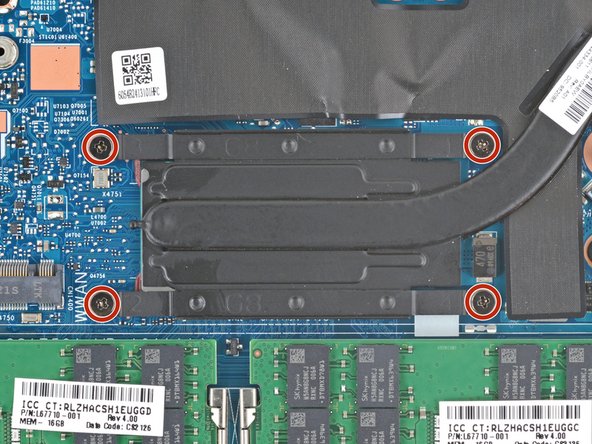
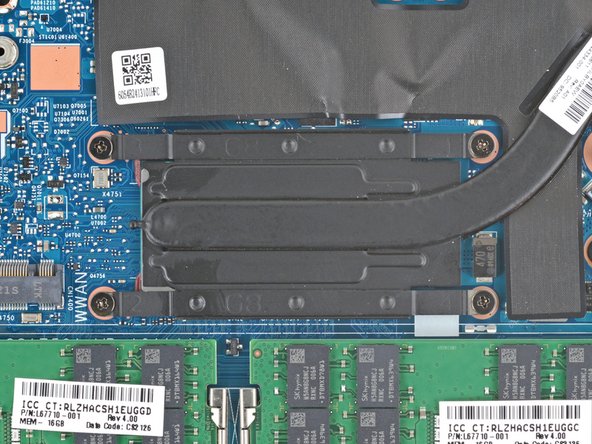
HP EliteBook 840 Aero G8 Heat Sink Prying, Unfasten the heat sink: crwdns2935265:00crwdnd2935265:01crwdnd2935265:02crwdne2935265:0 HP EliteBook 840 Aero G8 Heat Sink Prying, Unfasten the heat sink: crwdns2935265:00crwdnd2935265:02crwdnd2935265:02crwdne2935265:0
Unfasten the heat sink
  • Use a Phillips screwdriver to fully loosen (not remove) the four captive screws securing the heat sink. Loosen the screws in descending order based on the numbers stamped next to each screw.

  • During reassembly, tighten the heat sink screws a few turns at a time in ascending order based on the numbers stamped next to each screw., until snug. This will usually be in an "X" pattern.

Usa un destornillador Phillips para aflojar (no quitar) los cuatro tornillos cautivos que sujetan el disipador de calor. Afloja los tornillos en orden descendente según los números estampados junto a cada tornillo.

Durante el reensamblaje, aprieta los tornillos del disipador de calor unas vueltas cada vez en orden ascendente según los números estampados junto a cada tornillo, hasta que queden bien ajustados. Esto suele hacerse en forma de «X».

crwdns2944171:0crwdnd2944171:0crwdnd2944171:0crwdnd2944171:0crwdne2944171:0