crwdns2933423:0crwdne2933423:0

HP EliteBook 840 Aero G8 하단 커버 교체

crwdns2931529:0crwdnd2931529:0crwdnd2931529:0crwdnd2931529:087crwdnd2931529:0crwdne2931529:0

crwdns2936315:0crwdne2936315:0
crwdns2936325:0crwdne2936325:0
crwdns2931653:02crwdne2931653:0
HP EliteBook 840 Aero G8 Bottom Cover Replacement, Release the bottom cover clips: crwdns2935265:00crwdnd2935265:01crwdnd2935265:03crwdne2935265:0 HP EliteBook 840 Aero G8 Bottom Cover Replacement, Release the bottom cover clips: crwdns2935265:00crwdnd2935265:02crwdnd2935265:03crwdne2935265:0 HP EliteBook 840 Aero G8 Bottom Cover Replacement, Release the bottom cover clips: crwdns2935265:00crwdnd2935265:03crwdnd2935265:03crwdne2935265:0
Release the bottom cover clips
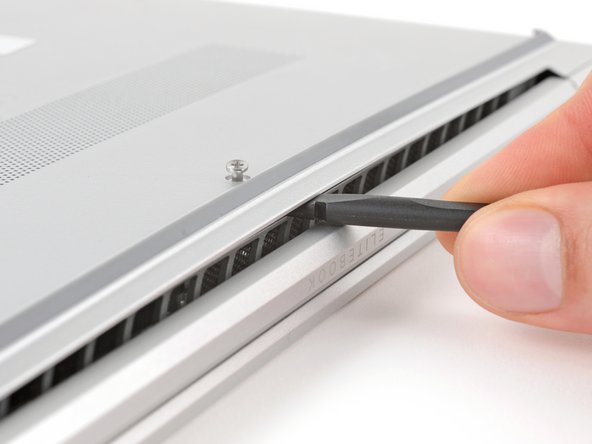
  • Position your laptop so the rear edge (with the screen hinge) is closest to you.

  • Insert the flat end of a spudger between the rear edge of the bottom cover and the frame, near the middle screw and ELITEBOOK text.

  • If you're having trouble inserting your spudger, make sure the screw is fully loosened. If necessary, use your fingers to gently pull the screw up.

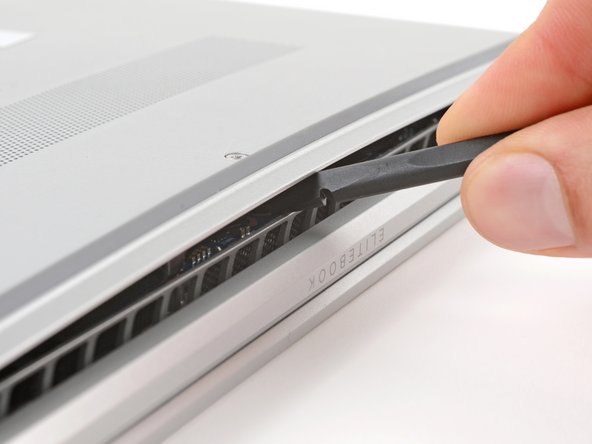
  • Use your spudger to pry up the cover to release the clip securing it.

  • Leave the spudger inserted under the bottom cover for the next step.

노트북을 후면 가장자리(스크린 힌지가 있는 쪽)가 사용자 쪽으로 가장 가까이 오도록 놓으세요.

스퍼저의 평평한 끝을 하단 커버의 후면 가장자리와 프레임 사이, 중간 나사와 ELITEBOOK 글자 근처에 끼워 넣으세요.

스퍼저를 끼우기가 어려우면 나사를 완전히 풀었는지 확인하세요. 필요한 경우 손가락으로 나사를 살살 당겨서 빼세요.

스퍼저를 사용하여 커버를 들어 올려 커버를 고정하는 클립을 풀어주세요.

다음 단계를 위해 스퍼저를 하단 커버 아래에 끼운채로 두세요.

crwdns2944171:0crwdnd2944171:0crwdnd2944171:0crwdnd2944171:0crwdne2944171:0