crwdns2933423:0crwdne2933423:0

Changement boîtier inférieur HP EliteBook 840 Aero G8

crwdns2931529:0crwdnd2931529:0crwdnd2931529:0crwdnd2931529:087crwdnd2931529:0crwdne2931529:0

crwdns2936315:0crwdne2936315:0
crwdns2936317:0crwdne2936317:0
crwdns2931653:02crwdne2931653:0
HP EliteBook 840 Aero G8 Bottom Cover Replacement, Release the bottom cover clips: crwdns2935265:00crwdnd2935265:01crwdnd2935265:03crwdne2935265:0 HP EliteBook 840 Aero G8 Bottom Cover Replacement, Release the bottom cover clips: crwdns2935265:00crwdnd2935265:02crwdnd2935265:03crwdne2935265:0 HP EliteBook 840 Aero G8 Bottom Cover Replacement, Release the bottom cover clips: crwdns2935265:00crwdnd2935265:03crwdnd2935265:03crwdne2935265:0
Release the bottom cover clips
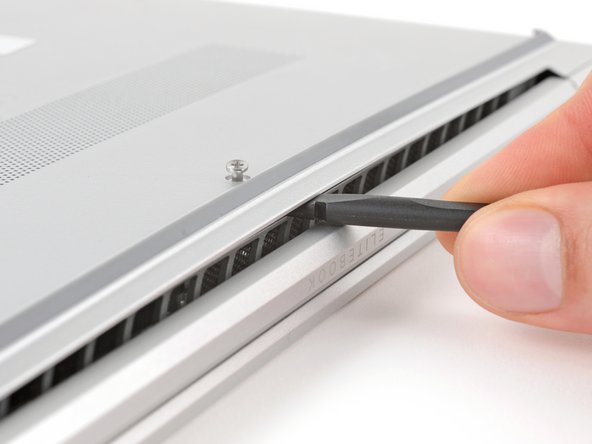
  • Position your laptop so the rear edge (with the screen hinge) is closest to you.

  • Insert the flat end of a spudger between the rear edge of the bottom cover and the frame, near the middle screw and ELITEBOOK text.

  • If you're having trouble inserting your spudger, make sure the screw is fully loosened. If necessary, use your fingers to gently pull the screw up.

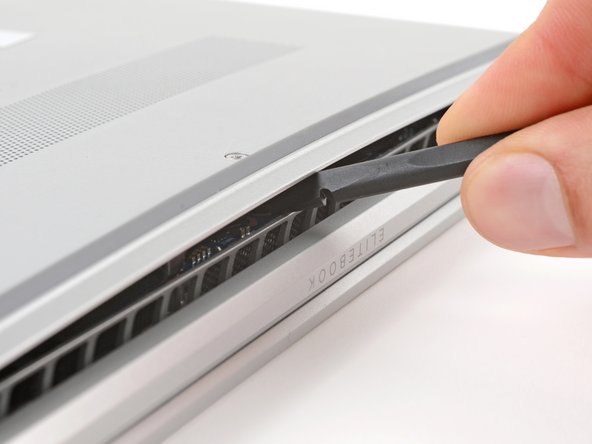
  • Use your spudger to pry up the cover to release the clip securing it.

  • Leave the spudger inserted under the bottom cover for the next step.

Positionnez votre ordinateur portable de manière à ce que le côté arrière (avec les charnières de l'écran) soit le plus près possible de vous.

Insérez l'extrémité plate d'une spatule (spudger) entre le côté arrière du boîtier inférieur et le châssis, près de la vis centrale et du texte ELITEBOOK.

Si vous avez du mal à insérer la spatule, assurez-vous que la vis est bien desserrée. Si nécessaire, utilisez vos doigts pour tirer délicatement la vis vers le haut.

Utilisez votre spatule pour soulever le boîtier, afin de détacher le clip qui le maintient en place.

Laissez la spatule sous le boîtier inférieur pour l'étape suivante.

crwdns2944171:0crwdnd2944171:0crwdnd2944171:0crwdnd2944171:0crwdne2944171:0