crwdns2933423:0crwdne2933423:0

Reemplazo de la tapa inferior del HP EliteBook 840 Aero G8

crwdns2931529:0crwdnd2931529:0crwdnd2931529:0crwdnd2931529:087crwdnd2931529:0crwdne2931529:0

crwdns2936315:0crwdne2936315:0
crwdns2936331:0crwdne2936331:0
crwdns2931653:02crwdne2931653:0
HP EliteBook 840 Aero G8 Bottom Cover Replacement, Release the bottom cover clips: crwdns2935265:00crwdnd2935265:01crwdnd2935265:03crwdne2935265:0 HP EliteBook 840 Aero G8 Bottom Cover Replacement, Release the bottom cover clips: crwdns2935265:00crwdnd2935265:02crwdnd2935265:03crwdne2935265:0 HP EliteBook 840 Aero G8 Bottom Cover Replacement, Release the bottom cover clips: crwdns2935265:00crwdnd2935265:03crwdnd2935265:03crwdne2935265:0
Release the bottom cover clips
  • Position your laptop so the rear edge (with the screen hinge) is closest to you.

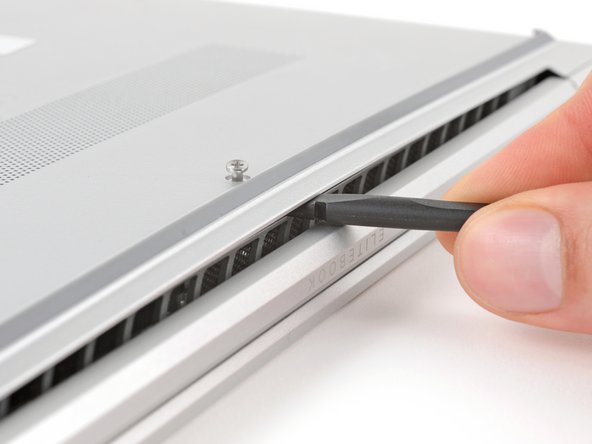
  • Insert the flat end of a spudger between the rear edge of the bottom cover and the frame, near the middle screw and ELITEBOOK text.

  • If you're having trouble inserting your spudger, make sure the screw is fully loosened. If necessary, use your fingers to gently pull the screw up.

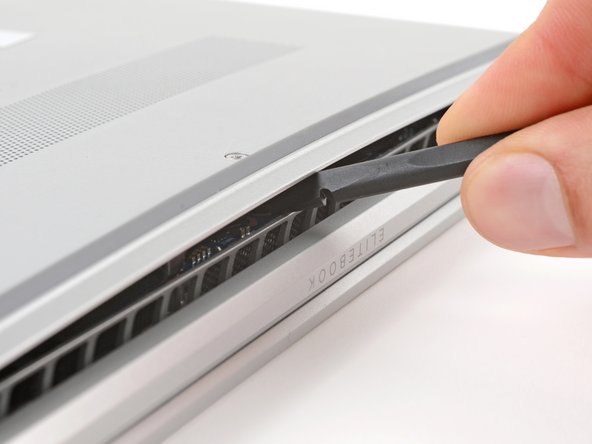
  • Use your spudger to pry up the cover to release the clip securing it.

  • Leave the spudger inserted under the bottom cover for the next step.

Coloca el portátil de forma que el borde trasero (con la bisagra de la pantalla) quede más cerca de ti.

Inserta el extremo plano de un spudger entre el borde trasero de la tapa inferior y el marco, cerca del tornillo central y del texto ELITEBOOK.

Si tienes problemas para insertar el spudger, asegúrate de que el tornillo está completamente aflojado. Si es necesario, utiliza los dedos paratirar del tornillo hacia arriba con cuidado.

Usa el spudger para hacer palanca en la tapa y liberar el clip que la sujeta.

Deja el spudger insertado debajo de la tapa inferior para el siguiente paso.

crwdns2944171:0crwdnd2944171:0crwdnd2944171:0crwdnd2944171:0crwdne2944171:0