crwdns2931527:0crwdnd2931527:0crwdnd2931527:0crwdnd2931527:0crwdne2931527:0
crwdns2935425:04crwdne2935425:0
crwdns2931653:04crwdne2931653:0

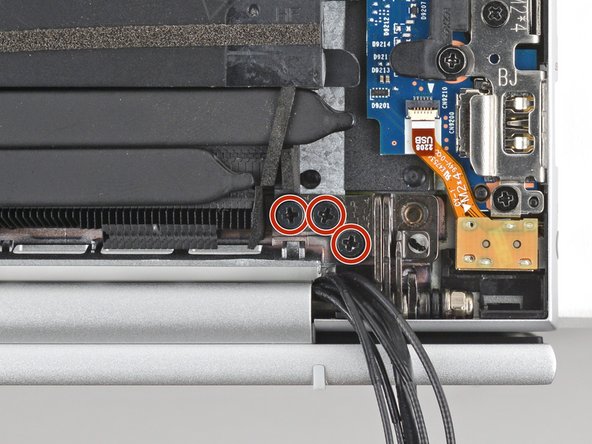
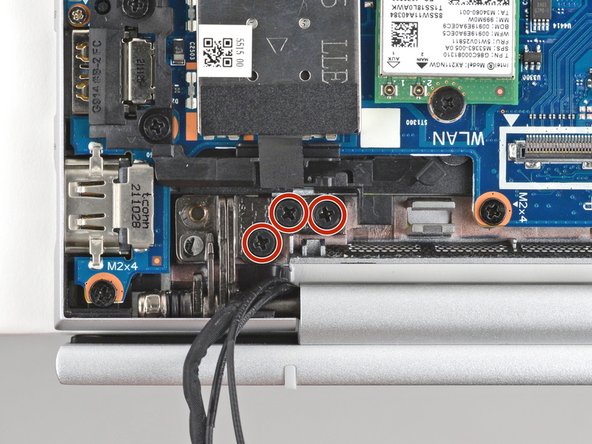


Remove the hinge screws
-
Use a Phillips screwdriver to remove the six 4.6 mm‑long hinge screws—three in each hinge.
crwdns2944171:0crwdnd2944171:0crwdnd2944171:0crwdnd2944171:0crwdne2944171:0