crwdns2933423:0crwdne2933423:0

HP EliteBook 840 G9 디스플레이 어셈블리 교체

crwdns2931527:0crwdnd2931527:0crwdnd2931527:0crwdnd2931527:0crwdne2931527:0

crwdns2936315:0crwdne2936315:0
crwdns2936325:0crwdne2936325:0
crwdns2931653:03crwdne2931653:0
HP EliteBook 840 G9 Display Assembly Replacement, Hang the screen over an edge: crwdns2935265:00crwdnd2935265:01crwdnd2935265:03crwdne2935265:0 HP EliteBook 840 G9 Display Assembly Replacement, Hang the screen over an edge: crwdns2935265:00crwdnd2935265:02crwdnd2935265:03crwdne2935265:0 HP EliteBook 840 G9 Display Assembly Replacement, Hang the screen over an edge: crwdns2935265:00crwdnd2935265:03crwdnd2935265:03crwdne2935265:0
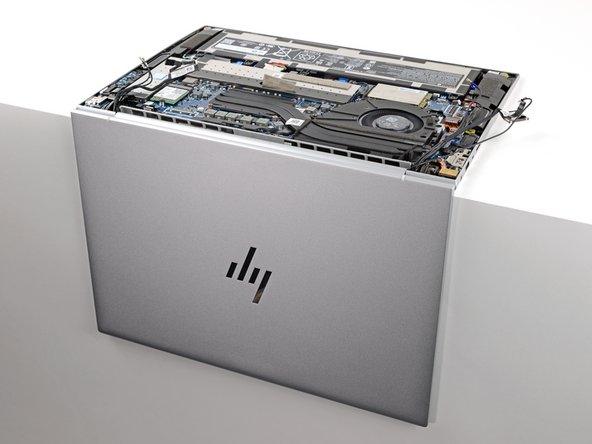
Hang the screen over an edge
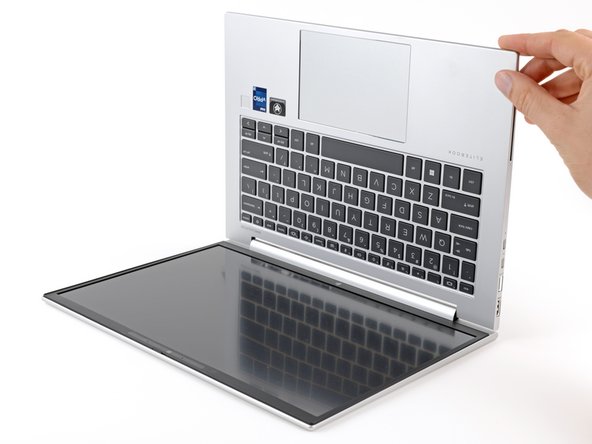
  • Make sure there aren't any loose components or rogue screws that might fall out of your laptop when you open it.

  • Grab the main body of your laptop and open it to a 90-degree angle.

  • Lay your laptop keyboard-side down on the edge of a flat, clean work surface, with the screen hanging over the edge, straight down.

  • During reassembly, if your screen clicks or snaps when it's opened or closed, loosen the screws and re‑align the screen.

노트북을 열 때 노트북에서 빠질 수 있는 느슨한 부품이나 이탈된 나사가 없는지 확인하세요.

노트북 본체를 잡고 90도 각도로 여세요.

평평하고 깨끗한 작업 표면의 가장자리에 노트북 키보드가 아래로 향하도록 놓고 스크린이 가장자리 너머로 똑바로 내려오도록 놓으세요.

재조립하는 동안 스크린을 열거나 닫을 때 딸깍 소리가 나면 나사를 풀고 스크린을 다시 정렬하세요.

crwdns2944171:0crwdnd2944171:0crwdnd2944171:0crwdnd2944171:0crwdne2944171:0