crwdns2933423:0crwdne2933423:0

Reemplazo del ensamblaje de la pantalla del HP EliteBook 840 G9

crwdns2931527:0crwdnd2931527:0crwdnd2931527:0crwdnd2931527:0crwdne2931527:0

crwdns2936315:0crwdne2936315:0
crwdns2936331:0crwdne2936331:0
crwdns2931653:04crwdne2931653:0
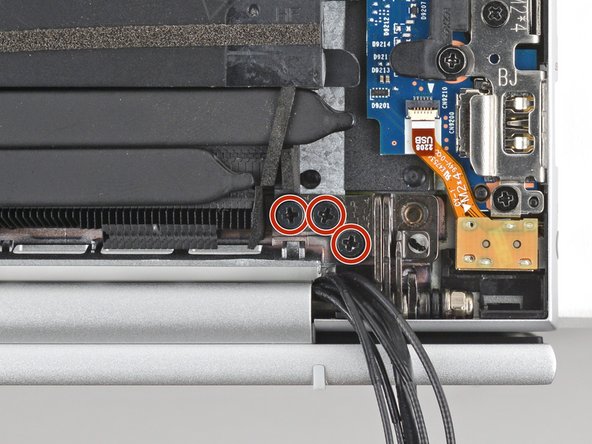
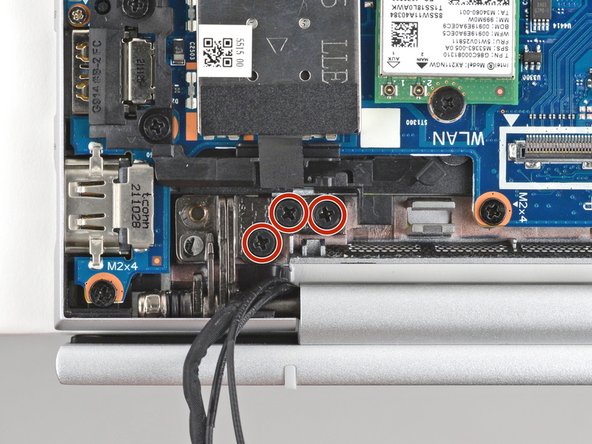
HP EliteBook 840 G9 Display Assembly Replacement, Remove the hinge screws: crwdns2935265:00crwdnd2935265:01crwdnd2935265:03crwdne2935265:0 HP EliteBook 840 G9 Display Assembly Replacement, Remove the hinge screws: crwdns2935265:00crwdnd2935265:02crwdnd2935265:03crwdne2935265:0 HP EliteBook 840 G9 Display Assembly Replacement, Remove the hinge screws: crwdns2935265:00crwdnd2935265:03crwdnd2935265:03crwdne2935265:0
Remove the hinge screws
  • Hold your laptop steady with your free hand while removing or installing hinge screws—don't let it fall off of your work surface.

  • Use a Phillips screwdriver to remove the six 4.6 mm‑long hinge screws—three in each hinge.

  • During reassembly, make sure the display is properly aligned before tightening the hinge screws.

Sujeta el portátil con la mano libre mientras quitas o instalas los tornillos de la bisagra; no dejes que se caiga de la superficie de trabajo.

Utiliza un destornillador Phillips para quitar los seis tornillos de 4,6 mm de largo de la bisagra, tres en cada bisagra.

Durante el reensamblaje, asegúrate de que la pantalla esté correctamente alineada antes de apretar los tornillos de la bisagra.

crwdns2944171:0crwdnd2944171:0crwdnd2944171:0crwdnd2944171:0crwdne2944171:0