crwdns2933423:0crwdne2933423:0

Reemplazo del ensamblaje de la pantalla del HP EliteBook 840 G9

crwdns2931527:0crwdnd2931527:0crwdnd2931527:0crwdnd2931527:0crwdne2931527:0

crwdns2936315:0crwdne2936315:0
crwdns2936331:0crwdne2936331:0
crwdns2931653:03crwdne2931653:0
HP EliteBook 840 G9 Display Assembly Replacement, Hang the screen over an edge: crwdns2935265:00crwdnd2935265:01crwdnd2935265:03crwdne2935265:0 HP EliteBook 840 G9 Display Assembly Replacement, Hang the screen over an edge: crwdns2935265:00crwdnd2935265:02crwdnd2935265:03crwdne2935265:0 HP EliteBook 840 G9 Display Assembly Replacement, Hang the screen over an edge: crwdns2935265:00crwdnd2935265:03crwdnd2935265:03crwdne2935265:0
Hang the screen over an edge
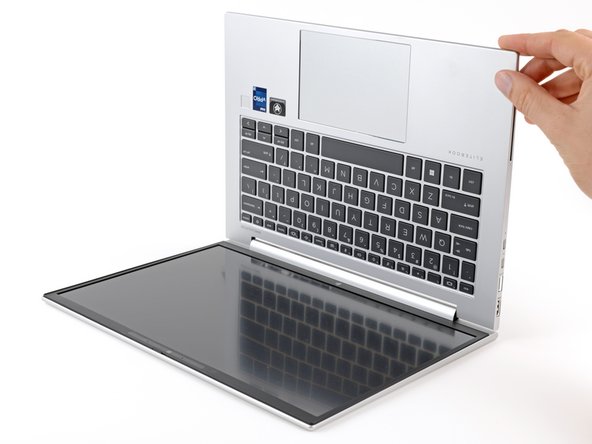
  • Make sure there aren't any loose components or rogue screws that might fall out of your laptop when you open it.

  • Grab the main body of your laptop and open it to a 90-degree angle.

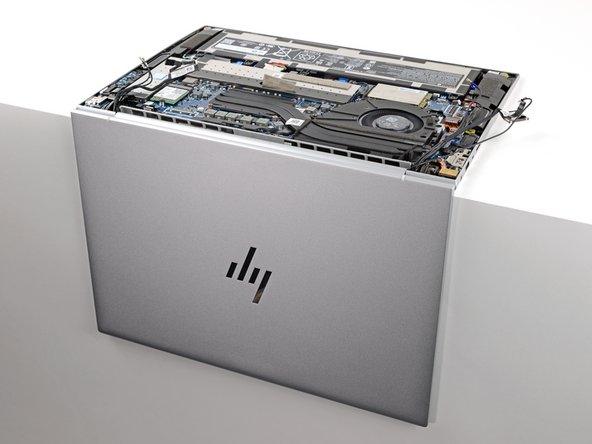
  • Lay your laptop keyboard-side down on the edge of a flat, clean work surface, with the screen hanging over the edge, straight down.

  • During reassembly, if your screen clicks or snaps when it's opened or closed, loosen the screws and re‑align the screen.

Asegúrate de que no haya componentes sueltos ni tornillos que puedan caerse del portátil al abrirlo.

Sujeta el cuerpo principal del portátil y ábrelo en un ángulo de 90 grados.

Coloca el portátil con el teclado hacia abajo sobre el borde de una superficie de trabajo plana y limpia, con la pantalla colgando sobre el borde, hacia abajo.

Durante el reensamblaje, si la pantalla hace clic o encaja al abrirla o cerrarla, afloja los tornillos y vuelve a alinear la pantalla.

crwdns2944171:0crwdnd2944171:0crwdnd2944171:0crwdnd2944171:0crwdne2944171:0