crwdns2933423:0crwdne2933423:0

HP EliteBook 840 G9 SSD 교체

crwdns2931527:0crwdnd2931527:0crwdnd2931527:0crwdnd2931527:0crwdne2931527:0

crwdns2935425:04crwdne2935425:0

crwdns2936315:0crwdne2936315:0
crwdns2936325:0crwdne2936325:0
crwdns2931653:04crwdne2931653:0
HP EliteBook 840 G9 SSD Replacement, Remove the SSD: crwdns2935265:00crwdnd2935265:01crwdnd2935265:03crwdne2935265:0 HP EliteBook 840 G9 SSD Replacement, Remove the SSD: crwdns2935265:00crwdnd2935265:02crwdnd2935265:03crwdne2935265:0 HP EliteBook 840 G9 SSD Replacement, Remove the SSD: crwdns2935265:00crwdnd2935265:03crwdnd2935265:03crwdne2935265:0
Remove the SSD
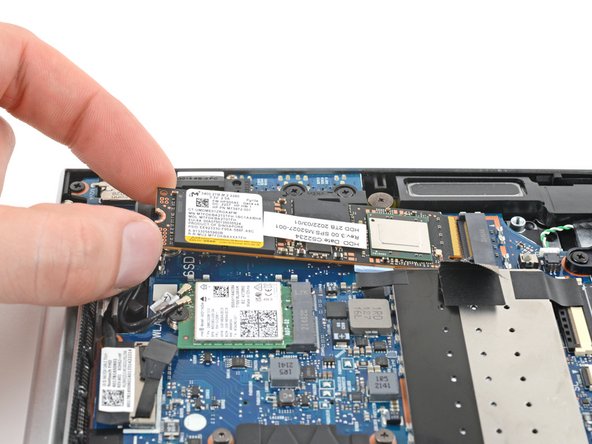
  • Don't pull up at a sharp angle, or you may damage the SSD and its socket.

  • Grip the SSD by its edges and pull it straight out of its socket to remove it.

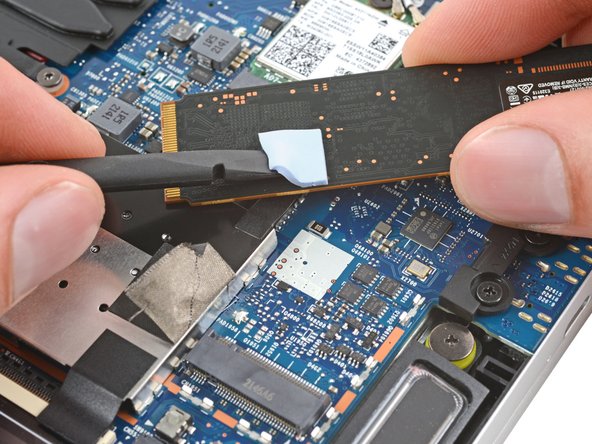
  • During reassembly, check if your replacement SSD has thermal pads installed. If it doesn't, remove and transfer the pads from the original SSD to your new one.

  • If the pad tears, and you need to replace it with the original size, use a 10 x 10 x 2 mm pad.

  • Depending on the replacement drive, you might not need any thermal pads.

급격한 각도로 잡아당기지 마세요. 아니면 SSD와 소켓이 손상될 수 있습니다.

SSD의 가장자리를 잡고 소켓에서 똑바로 당겨서 분리하세요.

재조립 할 때 교체용 SSD에 써멀 패드가 설치되어 있는지 확인하세요. 설치되어 있지 않은 경우 기존 SSD에서 패드를 분리하여 새 SSD로 옮기세요.

패드가 찢어져서 원래 크기로 교체해야 하는 경우 10 x 10 x 2mm 패드를 사용하세요.

교체하는 드라이브에 따라 열 패드가 필요하지 않을 수도 있습니다.

crwdns2944171:0crwdnd2944171:0crwdnd2944171:0crwdnd2944171:0crwdne2944171:0