crwdns2933423:0crwdne2933423:0

HP EliteBook 840 G9 SSDの交換

crwdns2931527:0crwdnd2931527:0crwdnd2931527:0crwdnd2931527:0crwdne2931527:0

crwdns2936315:0crwdne2936315:0
crwdns2936323:0crwdne2936323:0
crwdns2931653:02crwdne2931653:0
HP EliteBook 840 G9 SSD Replacement, Remove the SSD shield: crwdns2935265:00crwdnd2935265:01crwdnd2935265:03crwdne2935265:0 HP EliteBook 840 G9 SSD Replacement, Remove the SSD shield: crwdns2935265:00crwdnd2935265:02crwdnd2935265:03crwdne2935265:0 HP EliteBook 840 G9 SSD Replacement, Remove the SSD shield: crwdns2935265:00crwdnd2935265:03crwdnd2935265:03crwdne2935265:0
Remove the SSD shield
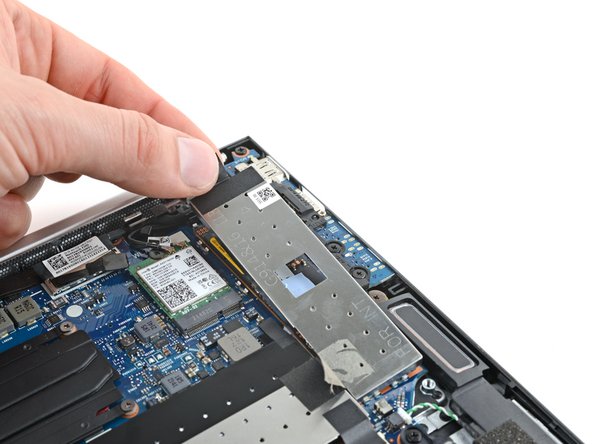
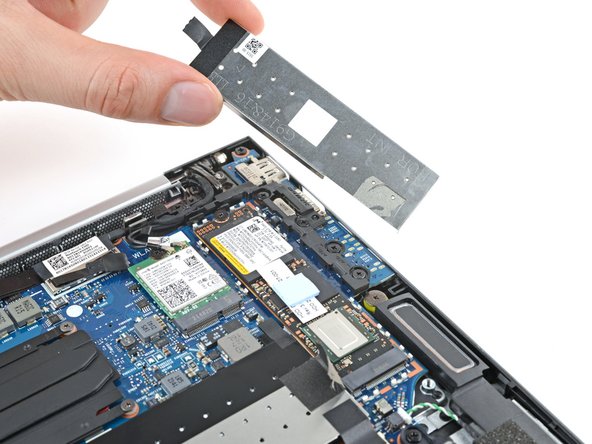
  • Use the pull tab on the top edge to lift and remove the shield.

  • During reassembly, align the shield with its metal clips on the board—to prevent damage, make sure the shield is sitting properly in the middle of each clip. Once the shield is properly aligned, firmly press down around the perimeter of the shield to secure it.

上端にあるプルタブを使用して、シールドを持ち上げて取り外します。

再組み立ての際は、シールドを基板上のメタルクリップに合わせます。損傷を防ぐため、シールドが各クリップの中央に適切に収まっていることを確認してください。シールドが正しく配置されたら、シールドの周囲をしっかりと押し込んで固定します。

crwdns2944171:0crwdnd2944171:0crwdnd2944171:0crwdnd2944171:0crwdne2944171:0