crwdns2933423:0crwdne2933423:0

Mini Digital Oszilloskop Lötbausatz

crwdns2936315:0crwdne2936315:0
crwdns2936319:0crwdne2936319:0
crwdns2931653:017crwdne2931653:0
Mini Digital Oscilloscope DIY Soldering Kit Assembly, Solder the microcontroller: crwdns2935265:00crwdnd2935265:01crwdnd2935265:03crwdne2935265:0 Mini Digital Oscilloscope DIY Soldering Kit Assembly, Solder the microcontroller: crwdns2935265:00crwdnd2935265:02crwdnd2935265:03crwdne2935265:0 Mini Digital Oscilloscope DIY Soldering Kit Assembly, Solder the microcontroller: crwdns2935265:00crwdnd2935265:03crwdnd2935265:03crwdne2935265:0
Solder the microcontroller
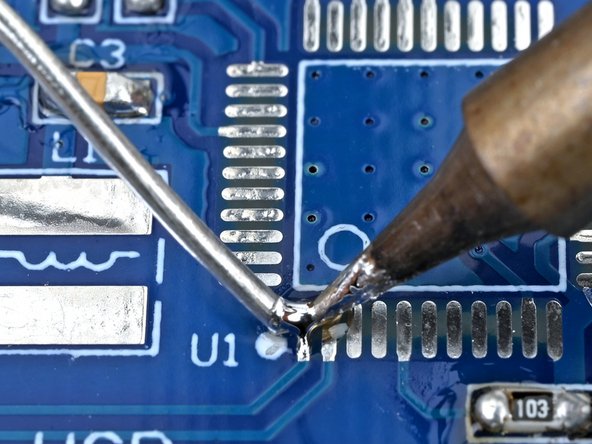
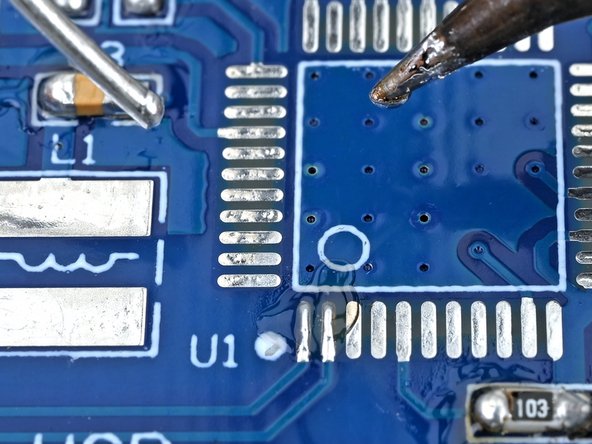
  • In this step, you're going to apply solder to one of the microcontroller pads to help with alignment when you solder it to the board.

  • Press the iron's tip against the board's bottom left microcontroller solder pad for a few seconds to heat it.

  • If you heat the circuit board continuously for more than 10 seconds, the excessive heat may damage the solder pad.

  • Feed the solder wire into the heated area until there's a small glob of solder on the pad.

  • Since these pads are so close together, it's easy for the solder to adhere to multiple pads. This is fine as long as the pads aren't bridged to each other.

Bei diesem Schritt wird etwas Lötzinn auf eine der Lötstellen für den Mikrokontroller gebracht, damit er beim Einbau genau befestigt werden kann.

Drücke die Lötspitze einige Sekunden lang gegen die untere linke Lötstelle für den Mikrokontroller auf der Leiterplatte, um sie zu erhitzen.

Wenn du die Lötstelle auf der Leiterplatte mehr als zehn Sekunden lang durchgängig erwärmst, kann sie beschädigt werden.

Halte den Lötdraht an die heiße Lötstelle, bis sich ein kleiner Zinnfleck darauf ausgebreitet hat.

Diese Lötstellen liegen nahe beieinander, deswegen kann es leicht passieren, dass du gleich mehrere auf einmal verzinnst. Solange sie dadurch keinen Kontakt haben, ist das in Ordnung.

crwdns2944171:0crwdnd2944171:0crwdnd2944171:0crwdnd2944171:0crwdne2944171:0