crwdns2933423:0crwdne2933423:0

Desmontaje reMarkable 2 con botón de encendido bloqueado

crwdns2936315:0crwdne2936315:0
crwdns2936331:0crwdne2936331:0
crwdns2931653:02crwdne2931653:0
Disassembling reMarkable 2 for a stuck power button, Remove screws and get access to internals: crwdns2935265:00crwdnd2935265:01crwdnd2935265:03crwdne2935265:0 Disassembling reMarkable 2 for a stuck power button, Remove screws and get access to internals: crwdns2935265:00crwdnd2935265:02crwdnd2935265:03crwdne2935265:0 Disassembling reMarkable 2 for a stuck power button, Remove screws and get access to internals: crwdns2935265:00crwdnd2935265:03crwdnd2935265:03crwdne2935265:0
Remove screws and get access to internals
  • Very carefully slice through the adhesive in the pink box and undo the connector using the plastic prying tool, this is the connector to the battery.

  • You will be cutting close to ribon cables so be very careful. (check step 4 for their location)

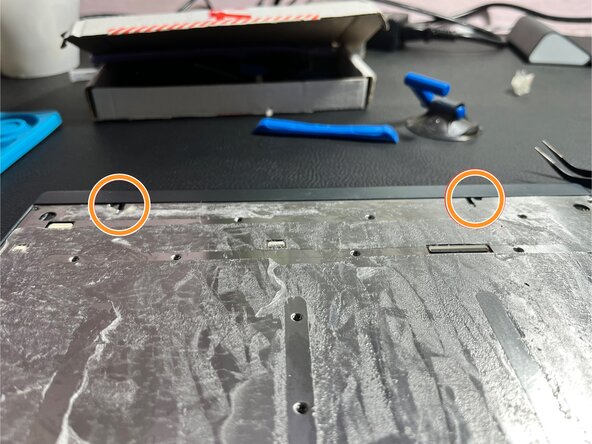
  • Start by removing the two silver screws in the orange boxes.

  • Pull the metal edge completly off. Be carefull as the power button is not held in place and will come come off along with the metal edge.

  • If you want to get power button unstuck, you don't need to remove the metal cover, but only the edge cover. For reparations not regarding the power button, remove also the metal cover. Follow the screw scheme in the first image to keep them separated by colour.

Separa con mucho cuidado el adhesivo negro del cuadro rosa y desconecta el conector usando la herramienta de plástico; este es el conector a la batería.

NO USES UNA CUCHILLA despega la pegatina negra para acceder al conector.

Comienza por retirar los tornillos de los círculos naranjas que sujetan el perfil metálico.

Desliza el perfil metálico un poco hasta liberar el espacio para los tornillos negros.

Retira los tornillos de los círculos azules

Retira el resto de tornillos de los círculos verdes.

crwdns2944171:0crwdnd2944171:0crwdnd2944171:0crwdnd2944171:0crwdne2944171:0