crwdns2933423:0crwdne2933423:0

Come applicare il nuovo adesivo per il vetro posteriore nel tuo Google Pixel 9

crwdns2936315:0crwdne2936315:0
crwdns2936321:0crwdne2936321:0
crwdns2931653:010crwdne2931653:0
How to Apply New Back Glass Adhesive in Your Google Pixel 9, Remove any camera bump liners: crwdns2935265:00crwdnd2935265:01crwdnd2935265:02crwdne2935265:0 How to Apply New Back Glass Adhesive in Your Google Pixel 9, Remove any camera bump liners: crwdns2935265:00crwdnd2935265:02crwdnd2935265:02crwdne2935265:0
Remove any camera bump liners
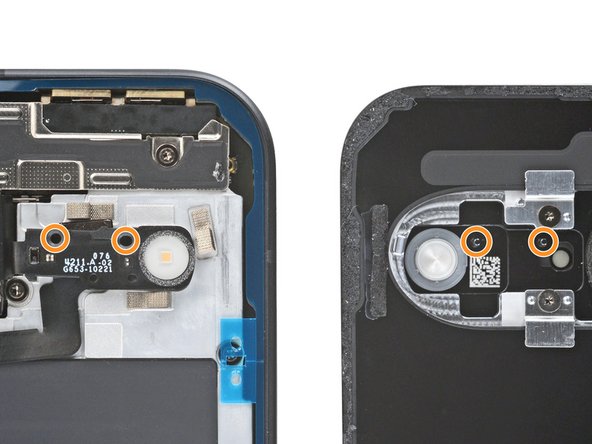
  • Remove any liners from the underside of the back glass, near the camera cutout area.

  • The flash unit has two circular cutouts along its top edge that correspond with metal posts on the underside of the back glass. When putting the back glass onto the frame, make sure the posts go into their cutouts.

Rimuovi eventuali rivestimenti dalla parte inferiore del vetro posteriore, vicino all'area del ritaglio per la fotocamera.

L'unità flash ha due ritagli circolari lungo il bordo superiore che corrispondono ai perni metallici sulla parte inferiore del vetro posteriore. Quando posizioni il vetro posteriore sul telaio, assicurati che i perni vadano nei loro ritagli.

crwdns2944171:0crwdnd2944171:0crwdnd2944171:0crwdnd2944171:0crwdne2944171:0