crwdns2933423:0crwdne2933423:0

Come applicare il nuovo adesivo per il vetro posteriore nel tuo Google Pixel 9

crwdns2936315:0crwdne2936315:0
crwdns2936321:0crwdne2936321:0
crwdns2931653:06crwdne2931653:0
How to Apply New Back Glass Adhesive in Your Google Pixel 9, Remove the first liner: crwdns2935265:00crwdnd2935265:01crwdnd2935265:03crwdne2935265:0 How to Apply New Back Glass Adhesive in Your Google Pixel 9, Remove the first liner: crwdns2935265:00crwdnd2935265:02crwdnd2935265:03crwdne2935265:0 How to Apply New Back Glass Adhesive in Your Google Pixel 9, Remove the first liner: crwdns2935265:00crwdnd2935265:03crwdnd2935265:03crwdne2935265:0
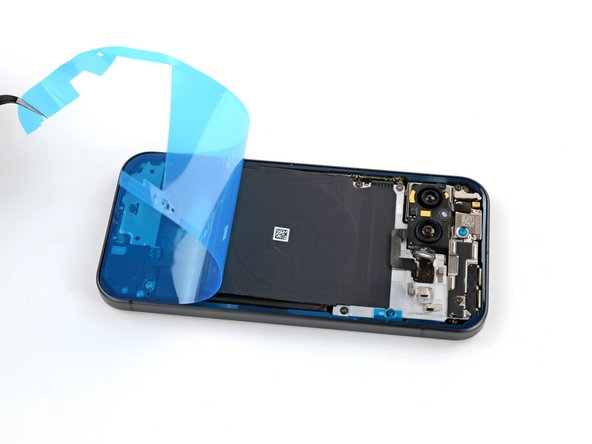
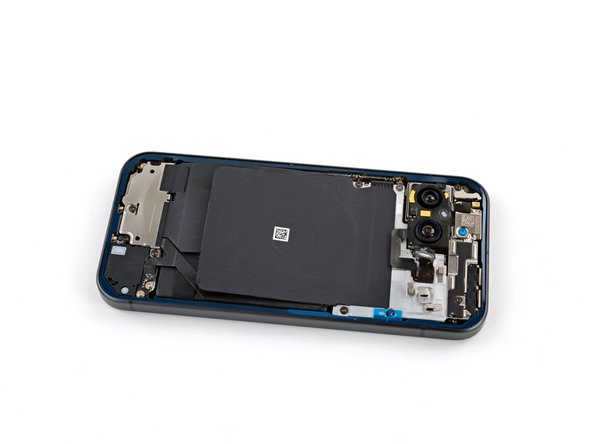
Remove the first liner
  • Grip the top right corner of the large blue liner with tweezers or your fingers and remove the liner.

  • If any of the adhesive starts to peel up with the liner, gently lay it back on the frame and use the flat end of a spudger to secure it.

Afferra l'angolo in alto a destra del grande rivestimento blu con delle pinzette o con le dita e rimuovi il rivestimento.

Se qualche parte dell'adesivo inizia a sollevarsi con il rivestimento, adagialo delicatamente di nuovo sul telaio e usa l'estremità piatta di uno spudger per fissarlo.

crwdns2944171:0crwdnd2944171:0crwdnd2944171:0crwdnd2944171:0crwdne2944171:0